All Tutorials  ⟩  The CATALOG  ⟩  Adding & Deleting Tracks

Adding & Deleting Tracks

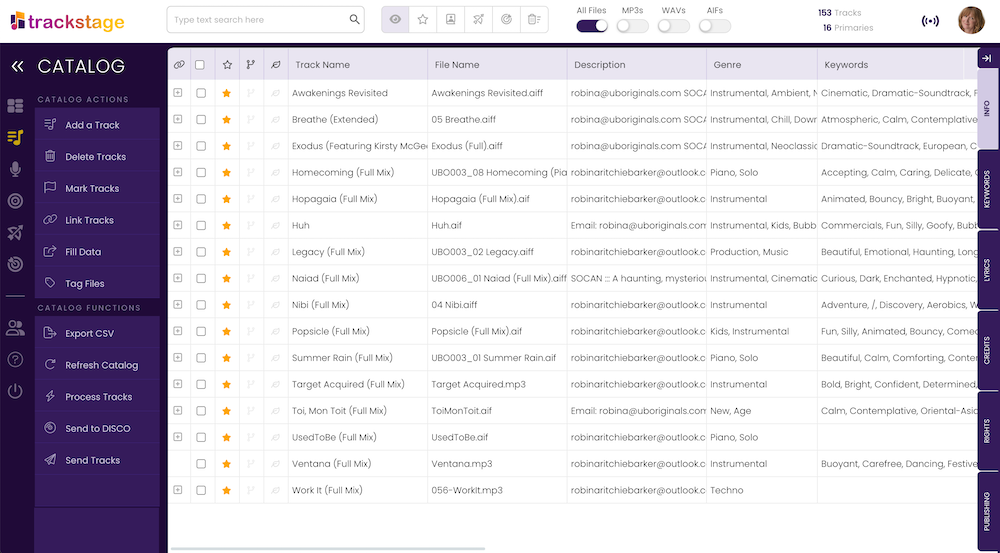
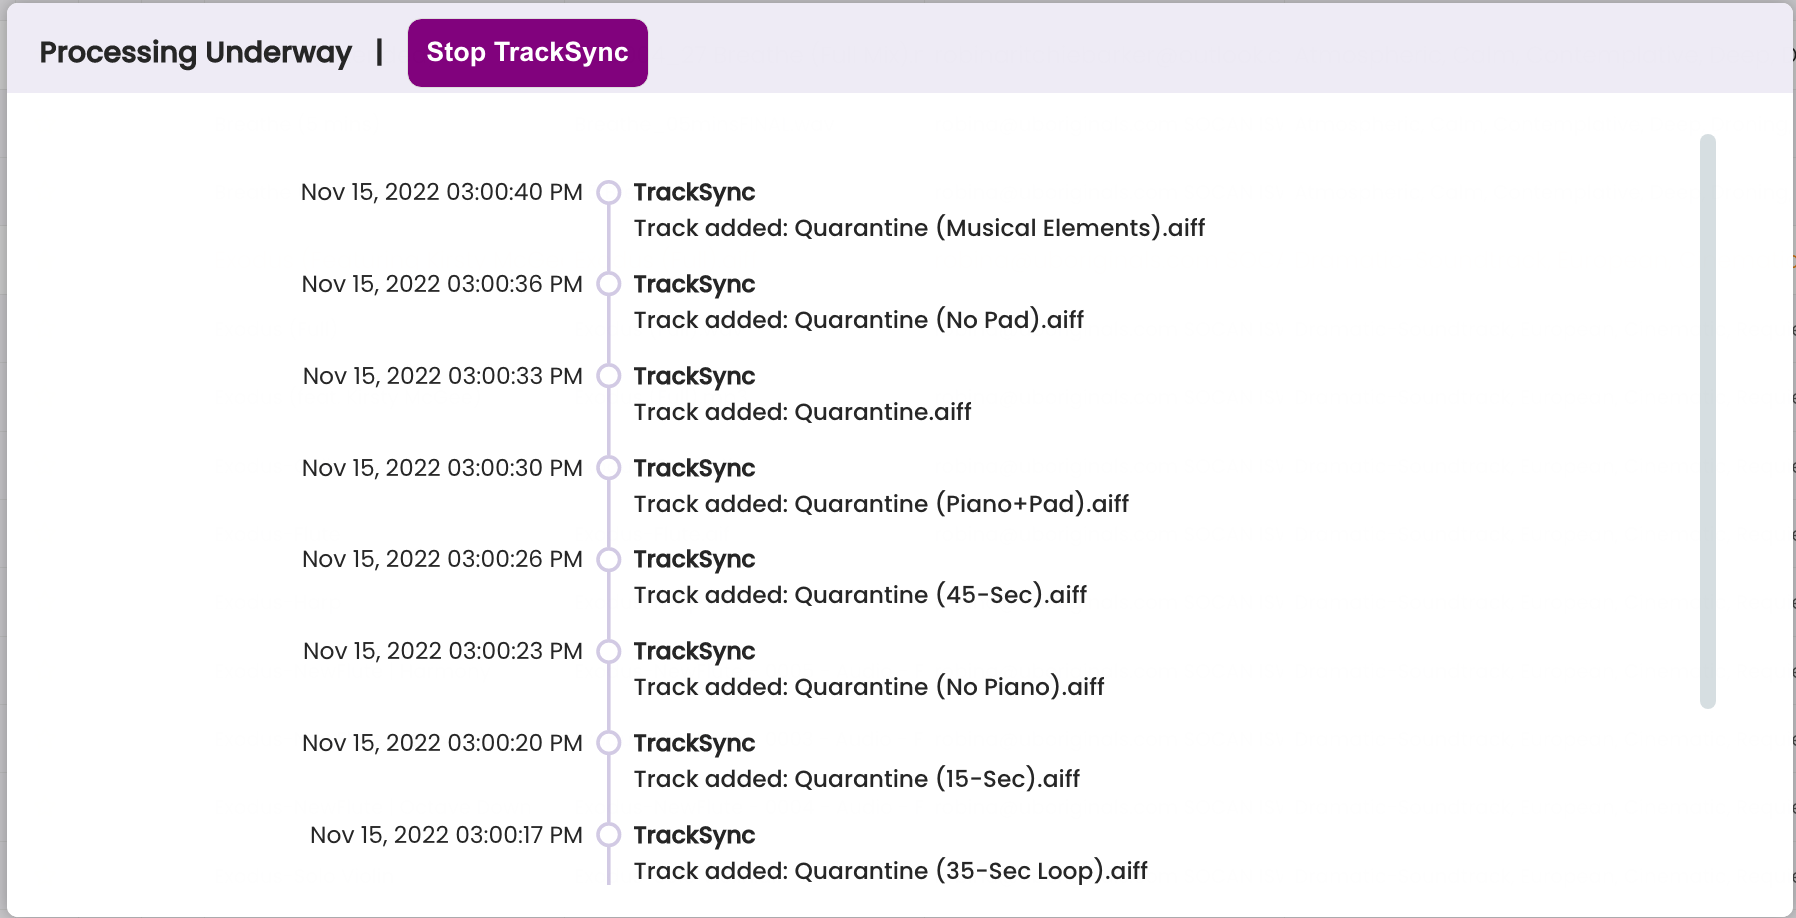
TrackStage removes the task of manually typing in new tracks to a spreadsheet. Adding and deleting tracks is as simple as drag and drop in your TrackStage Folder.

TrackStage Logo

Adding Tracks

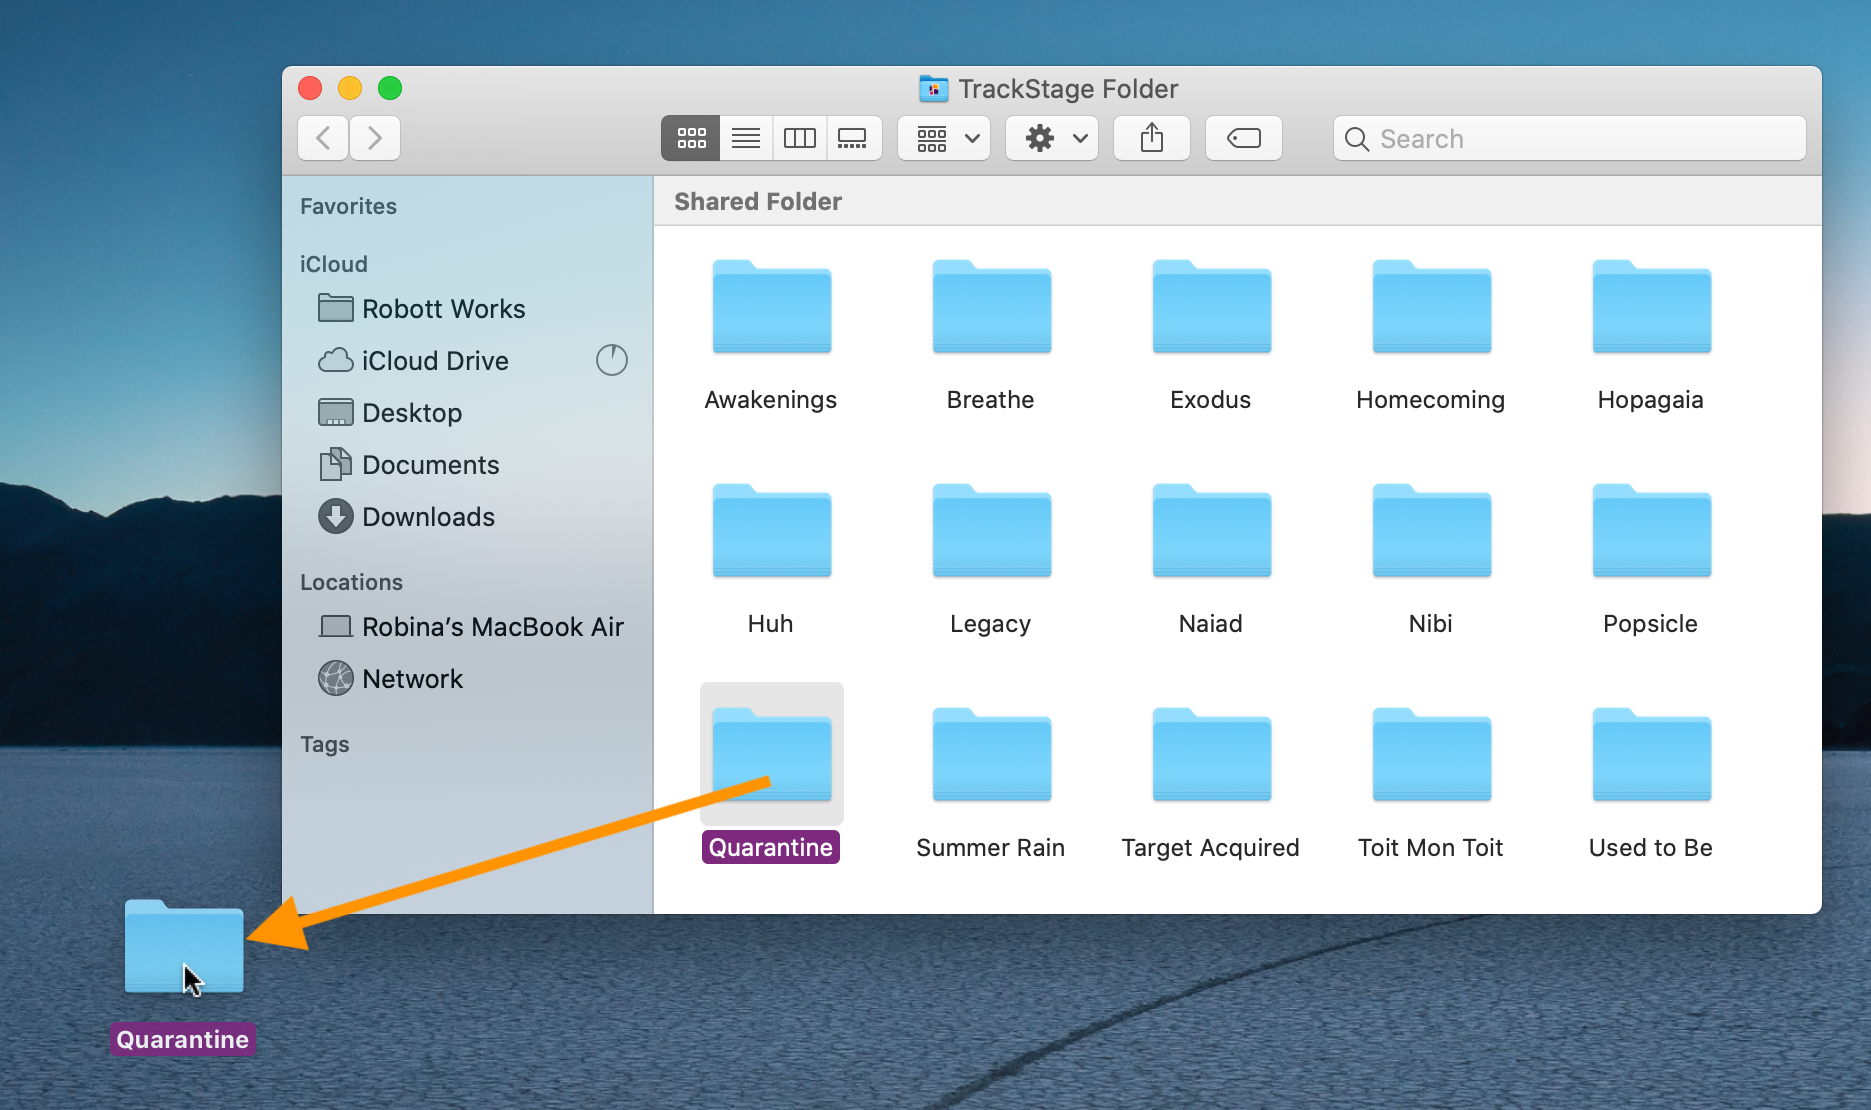
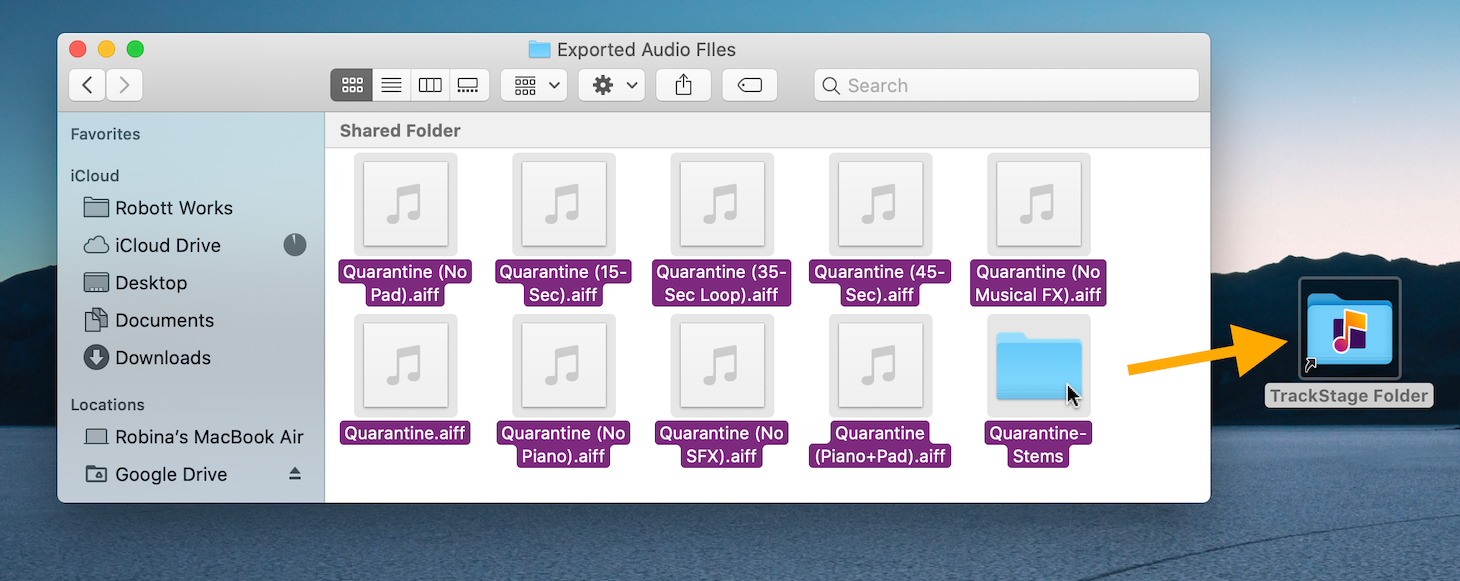
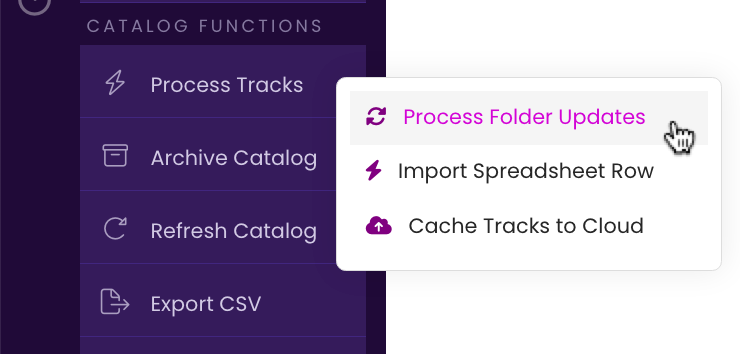
To add new tracks to your TrackStage Catalog, start on your hard drive.

  1. Drag the new track(s) to your TrackStage folder on your hard drive.
    You can drag individual tracks or you can drag an entire folder. You can also set up sub-folders within the TrackStage folder if you want to organize your directory. It won't make a difference to TrackStage.

    If you haven't set up your TrackStage folder yet, see Setting Up Your TrackStage Folder before adding tracks.


    Dragging files out of the TrackStage Folder to remove them from the Catalog


  2. Log in to TrackStage.
    Go to the CATALOG module.

    TrackStage Catalog before Quarantine tracks are added.


  3. Verify that TrackSync is running.
    Make sure the TrackSync status is purple.

    TrackSync status icon showing as online.

    If the TrackSync status is orange, go to your Applications folder and start the TrackSync application.

    TrackSync status icon is orange when offline.       TrackSync Application icon.


  4. Synchronize your tracks.
    From the Side Menu, click on Process Tracks > Process Folder Updates.

    The Process Tracks button in the Side Menu of the TrackStage Catalog.


    TrackSync will check your TrackStage folder for changes, see the new track(s) and will bring them into your TrackStage Catalog.

    TrackSync window processing the added files.

    Depending on how many tracks you are bringing in at one time, this may take a little time. If you need to pause TrackSync, click on Stop TrackSync and the processing will stop. When you want to restart just start the Process Folder Updates process again. TrackSync will pick up where it left off.


  5. The Tracks are now in your Catalog, ready to be edited.
    Any metadata that was on the audio files when you dragged them into your TrackStage folder will show up in your TrackStage Catalog. No need to re-enter it.

    The TrackStage Catalog showing the added tracks.


Deleting Tracks

Deleting Tracks is a two-step process to ensure you don't inadvertently lose your track information. First you need to remove the tracks from the TrackStage folder, then you delete them from the Catalog.

  1. Remove the track(s) from your TrackStage Folder.
    Delete or drag the track(s) you wish to remove from your Catalog out of your TrackStage folder on your hard drive.

    Dragging a folder of audio files out of the TrackStage Folder to remove them from the catalog.


  2. Log in to TrackStage.
    Go to the CATALOG module.

    The Catalog showing the removed tracks still prior to processing


  3. Verify that TrackSync is running.
    Make sure the TrackSync status is purple.

    TrackSync status icon in purple, showing that it is online.

    If the TrackSync status is orange, go to your Applications folder and start the TrackSync application.

    TrackSync status icon in orange, showing that it is offline.       TrackSync application icon.


  4. Synchronize your tracks.
    From the Side Menu, click on Process Tracks > Process Folder Updates.

    The Process Tracks > Process Folder Updates button in the TrackStage Side Menu.


    TrackSync will check your TrackStage folder for changes, see that tracks have been removed and will update your TrackStage Catalog.

    TrackSync window processing the tracks as having been removed from the TrackStage Folder.

    The Catalog will refresh and your removed tracks will show up in RED. This is to alert you that these audio files are no longer in the TrackStage folder. If you want to retain the information that is in TrackStage, you'll want to drag those files back in to the folder and then Process Tracks again. If you're good with getting rid of the info and the tracks, you can proceed with deleting them from your Catalog.

    TrackStage Catalog showing the tracks that have been removed in red.


  5. Unlink Tracks
    Before deleting the removed tracks from your catalog, they have to be unlinked from any groups. If the removed tracks aren't linked, you can skip to Step 6.

    Select all the removed tracks and click Link Tracks.


    TrackStage Catalog with removed tracks selected and the Link Tracks button being pressed.


    Click Unlink Tracks.

    The Link Tracks window with the removed tracks and the Unlink button pressed.


  6. Select all removed tracks and click Delete Tracks.
    WARNING: This cannot be undone. Once the tracks are deleted from the Catalog, all information that isn't already tagged to the audio files will be deleted.

    The removed and unlinked tracks selected in the Catalog with the Delete Tracks button being pressed.


  7. The tracks are deleted.
    The Catalog is refreshed and the removed tracks are deleted.

    The refreshed Catalog showing the removed tracks have been deleted.