All Tutorials  ⟩  The CATALOG  ⟩  Catalog Workflow  ⟩  Tagging Metadata

The Tag Files Function

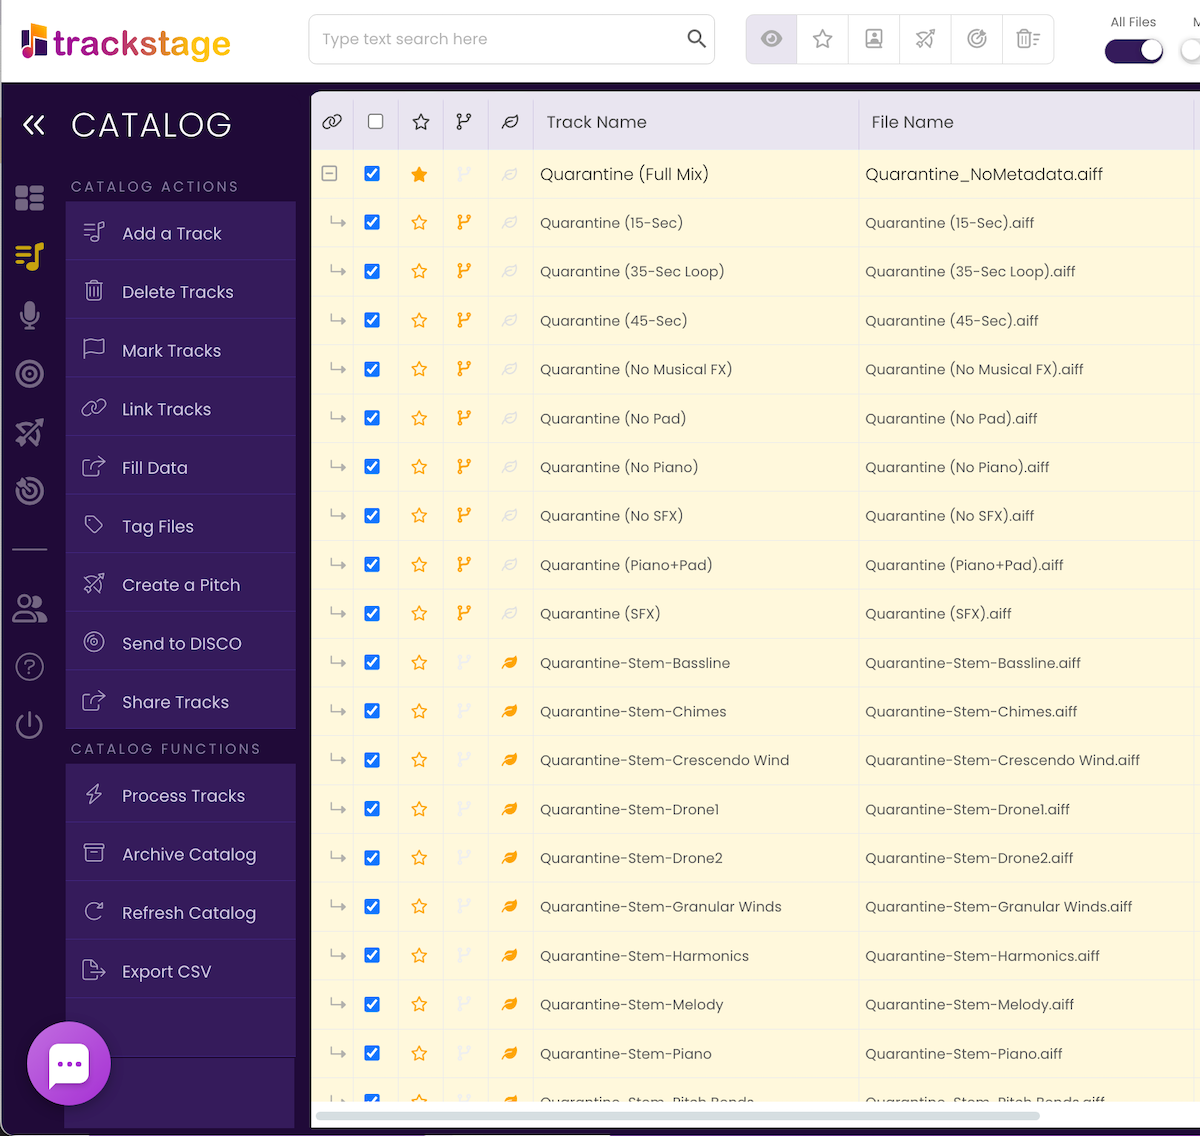
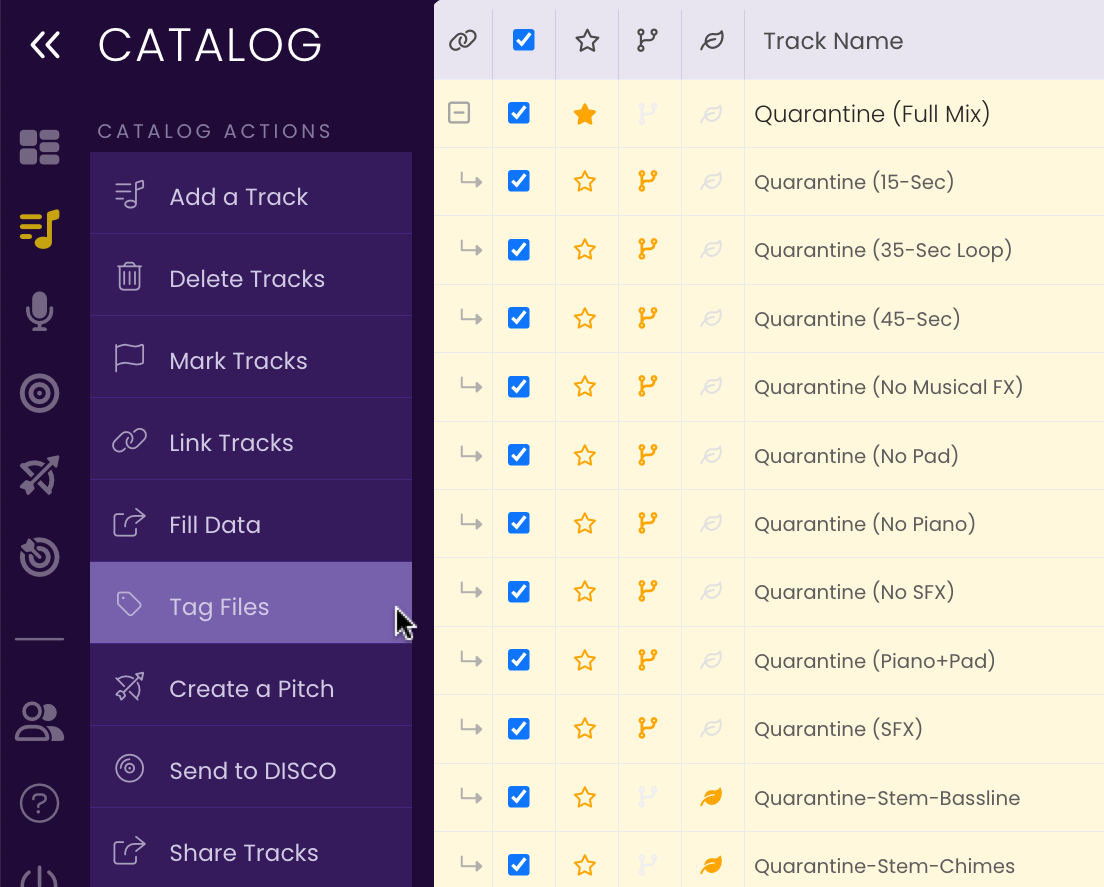
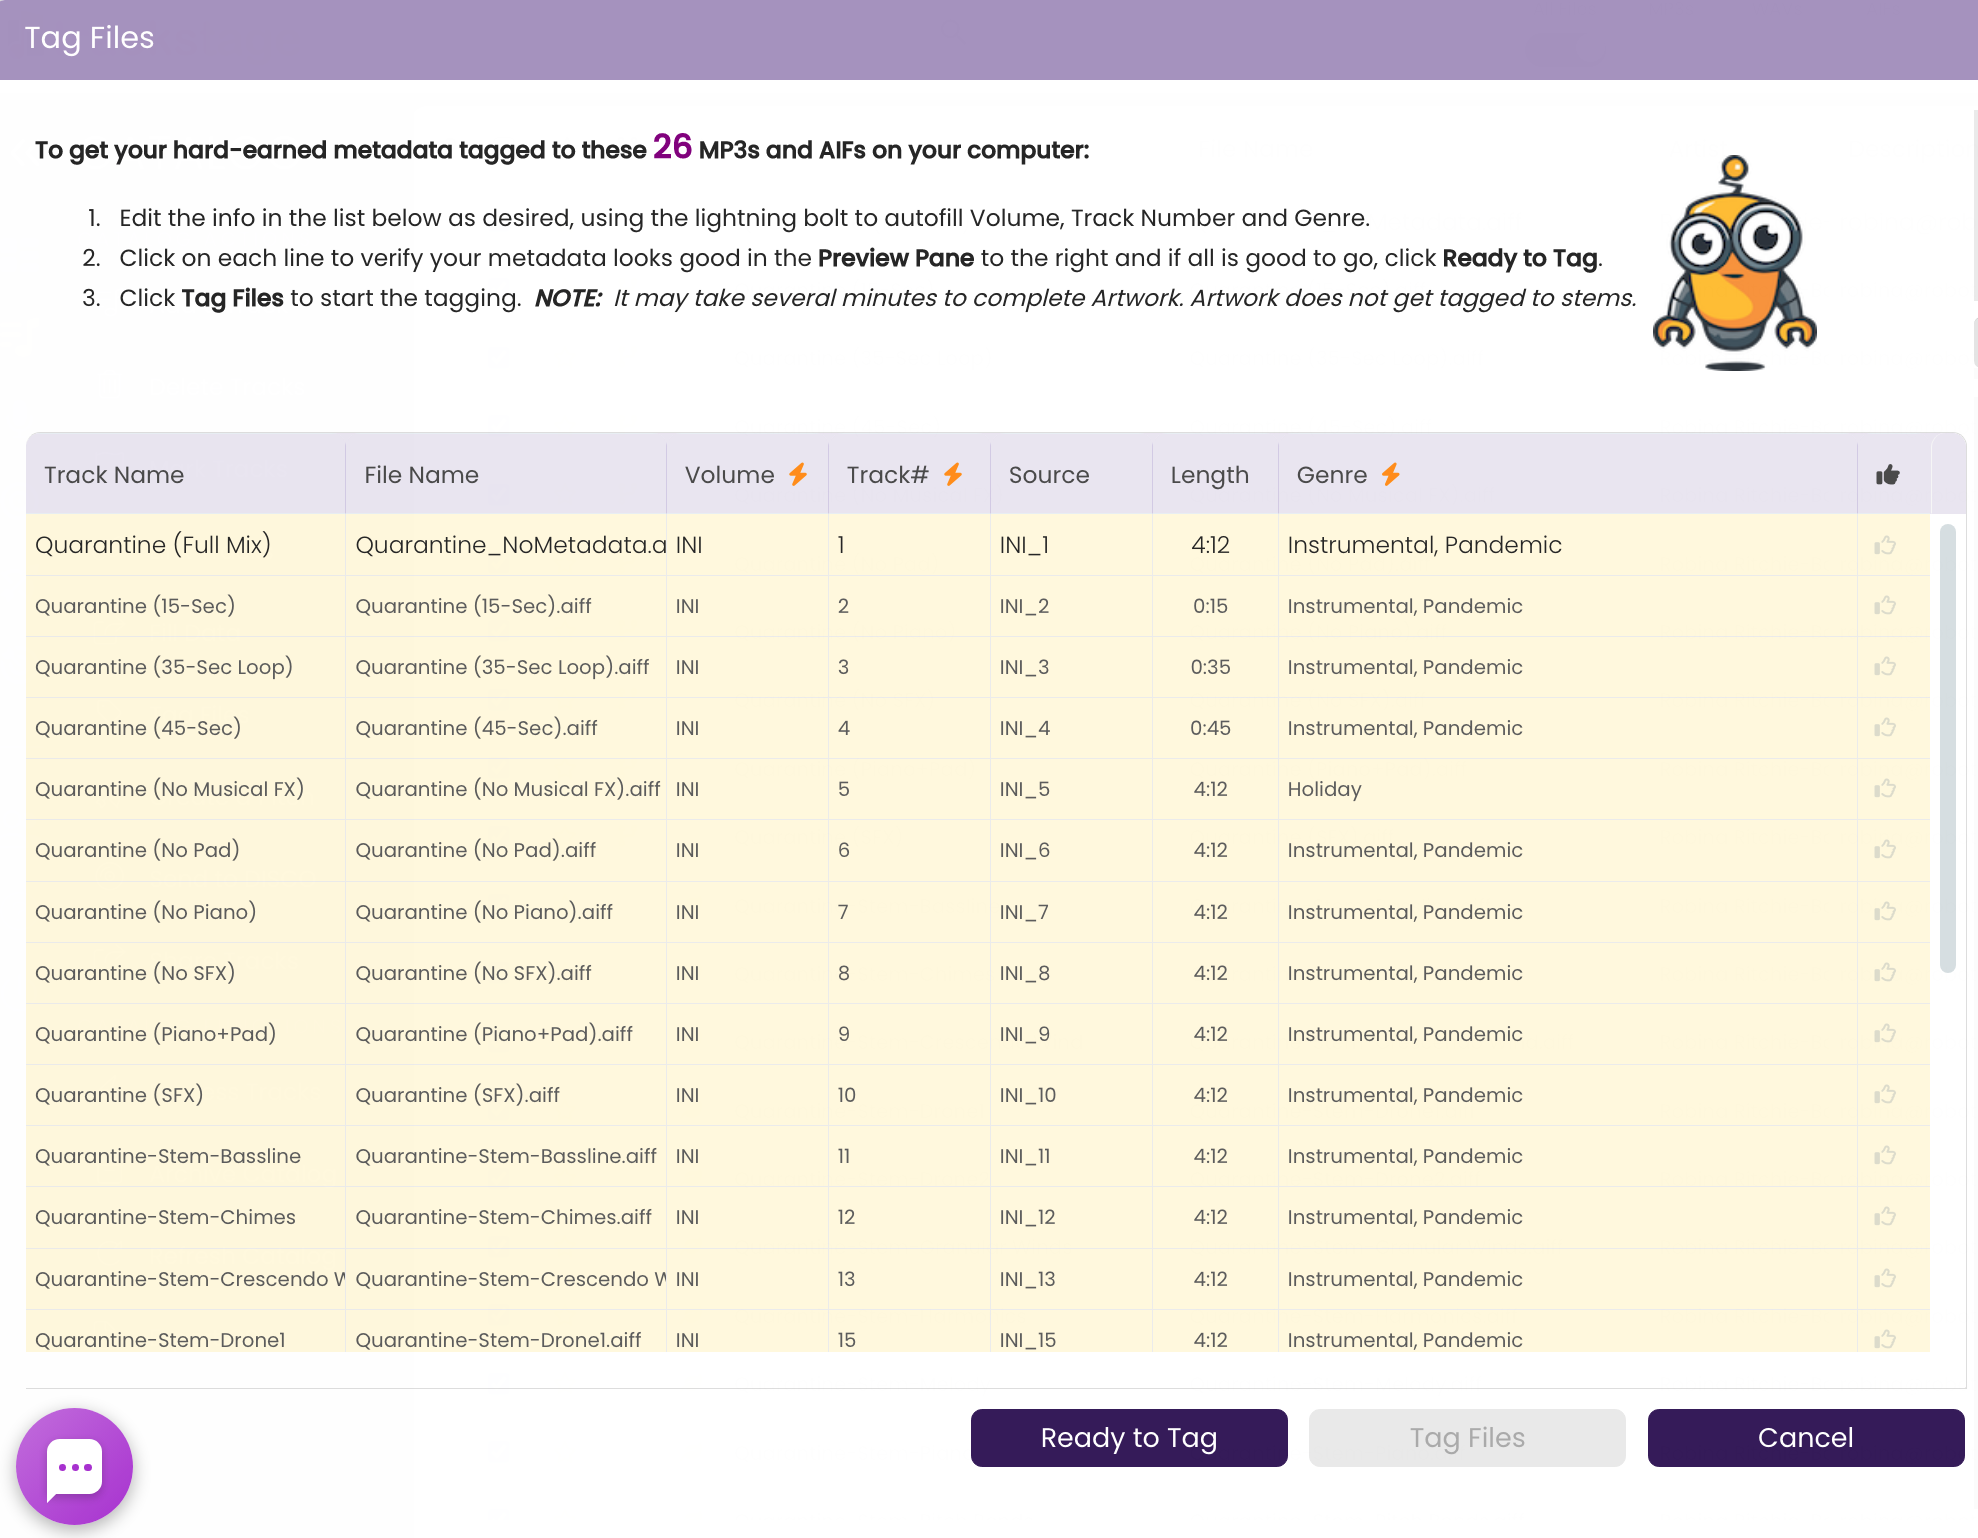
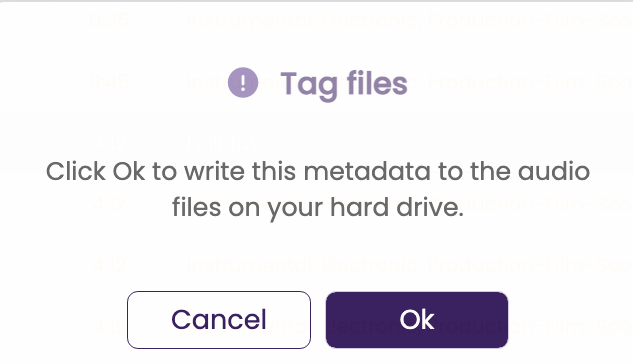
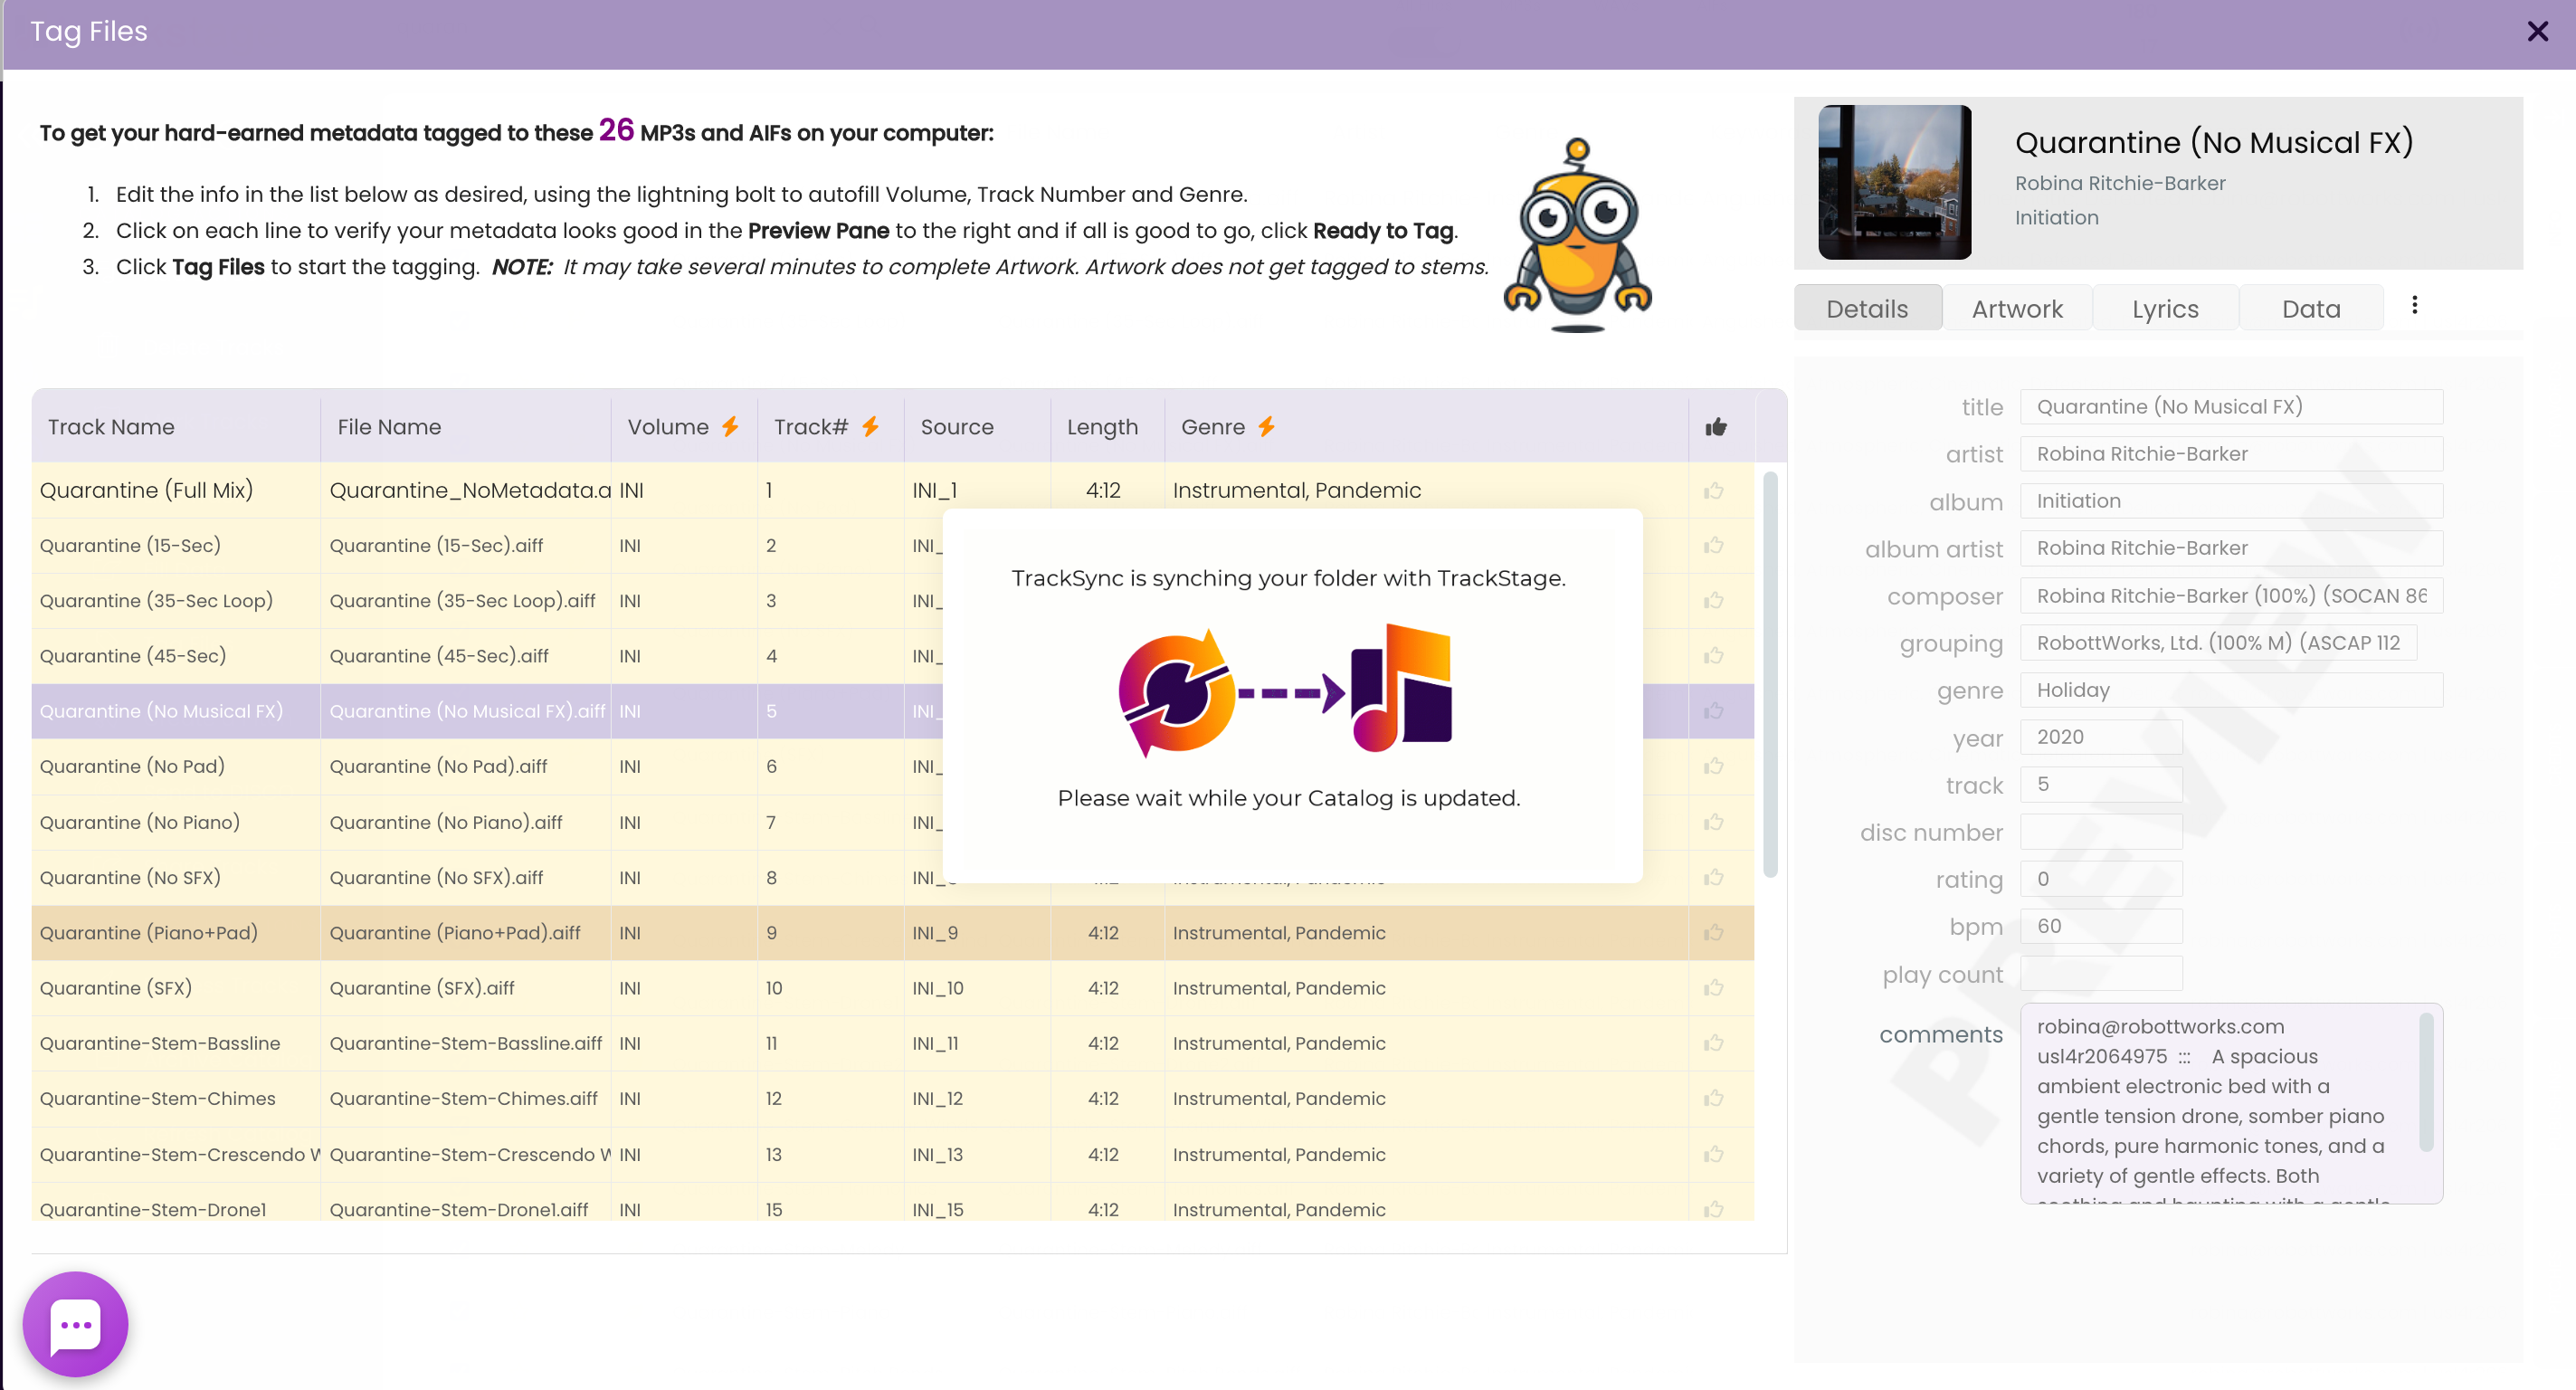
TrackStage enables you to tag metadata directly to the audio files on your hard drive right from your CATALOG.

TrackStage Icon

Tagging Metadata

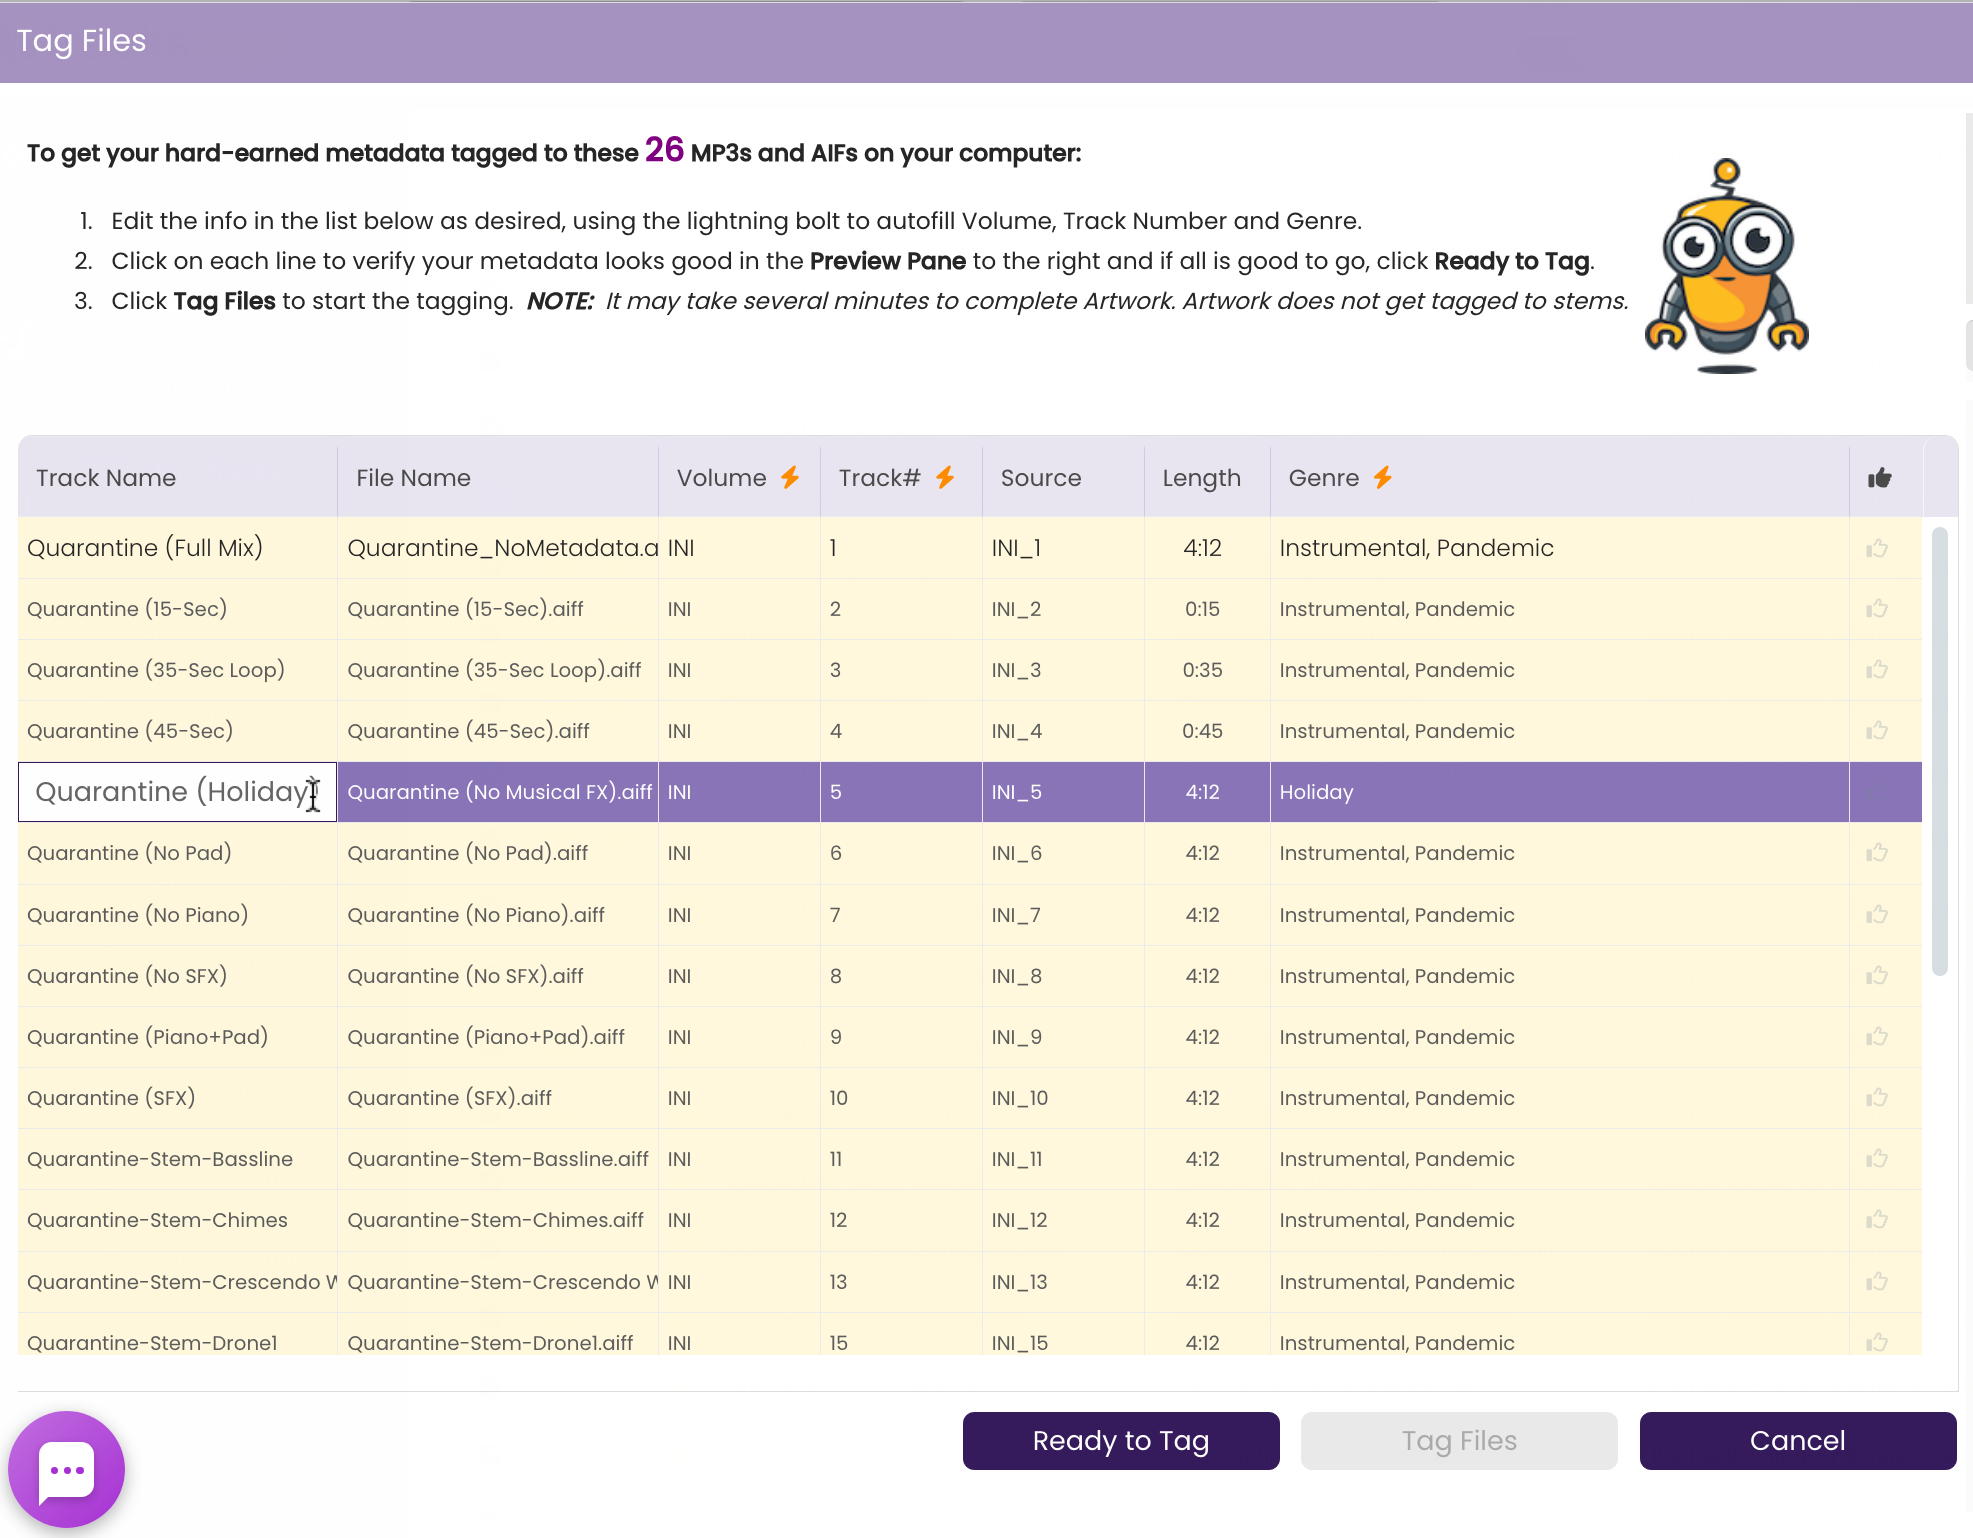
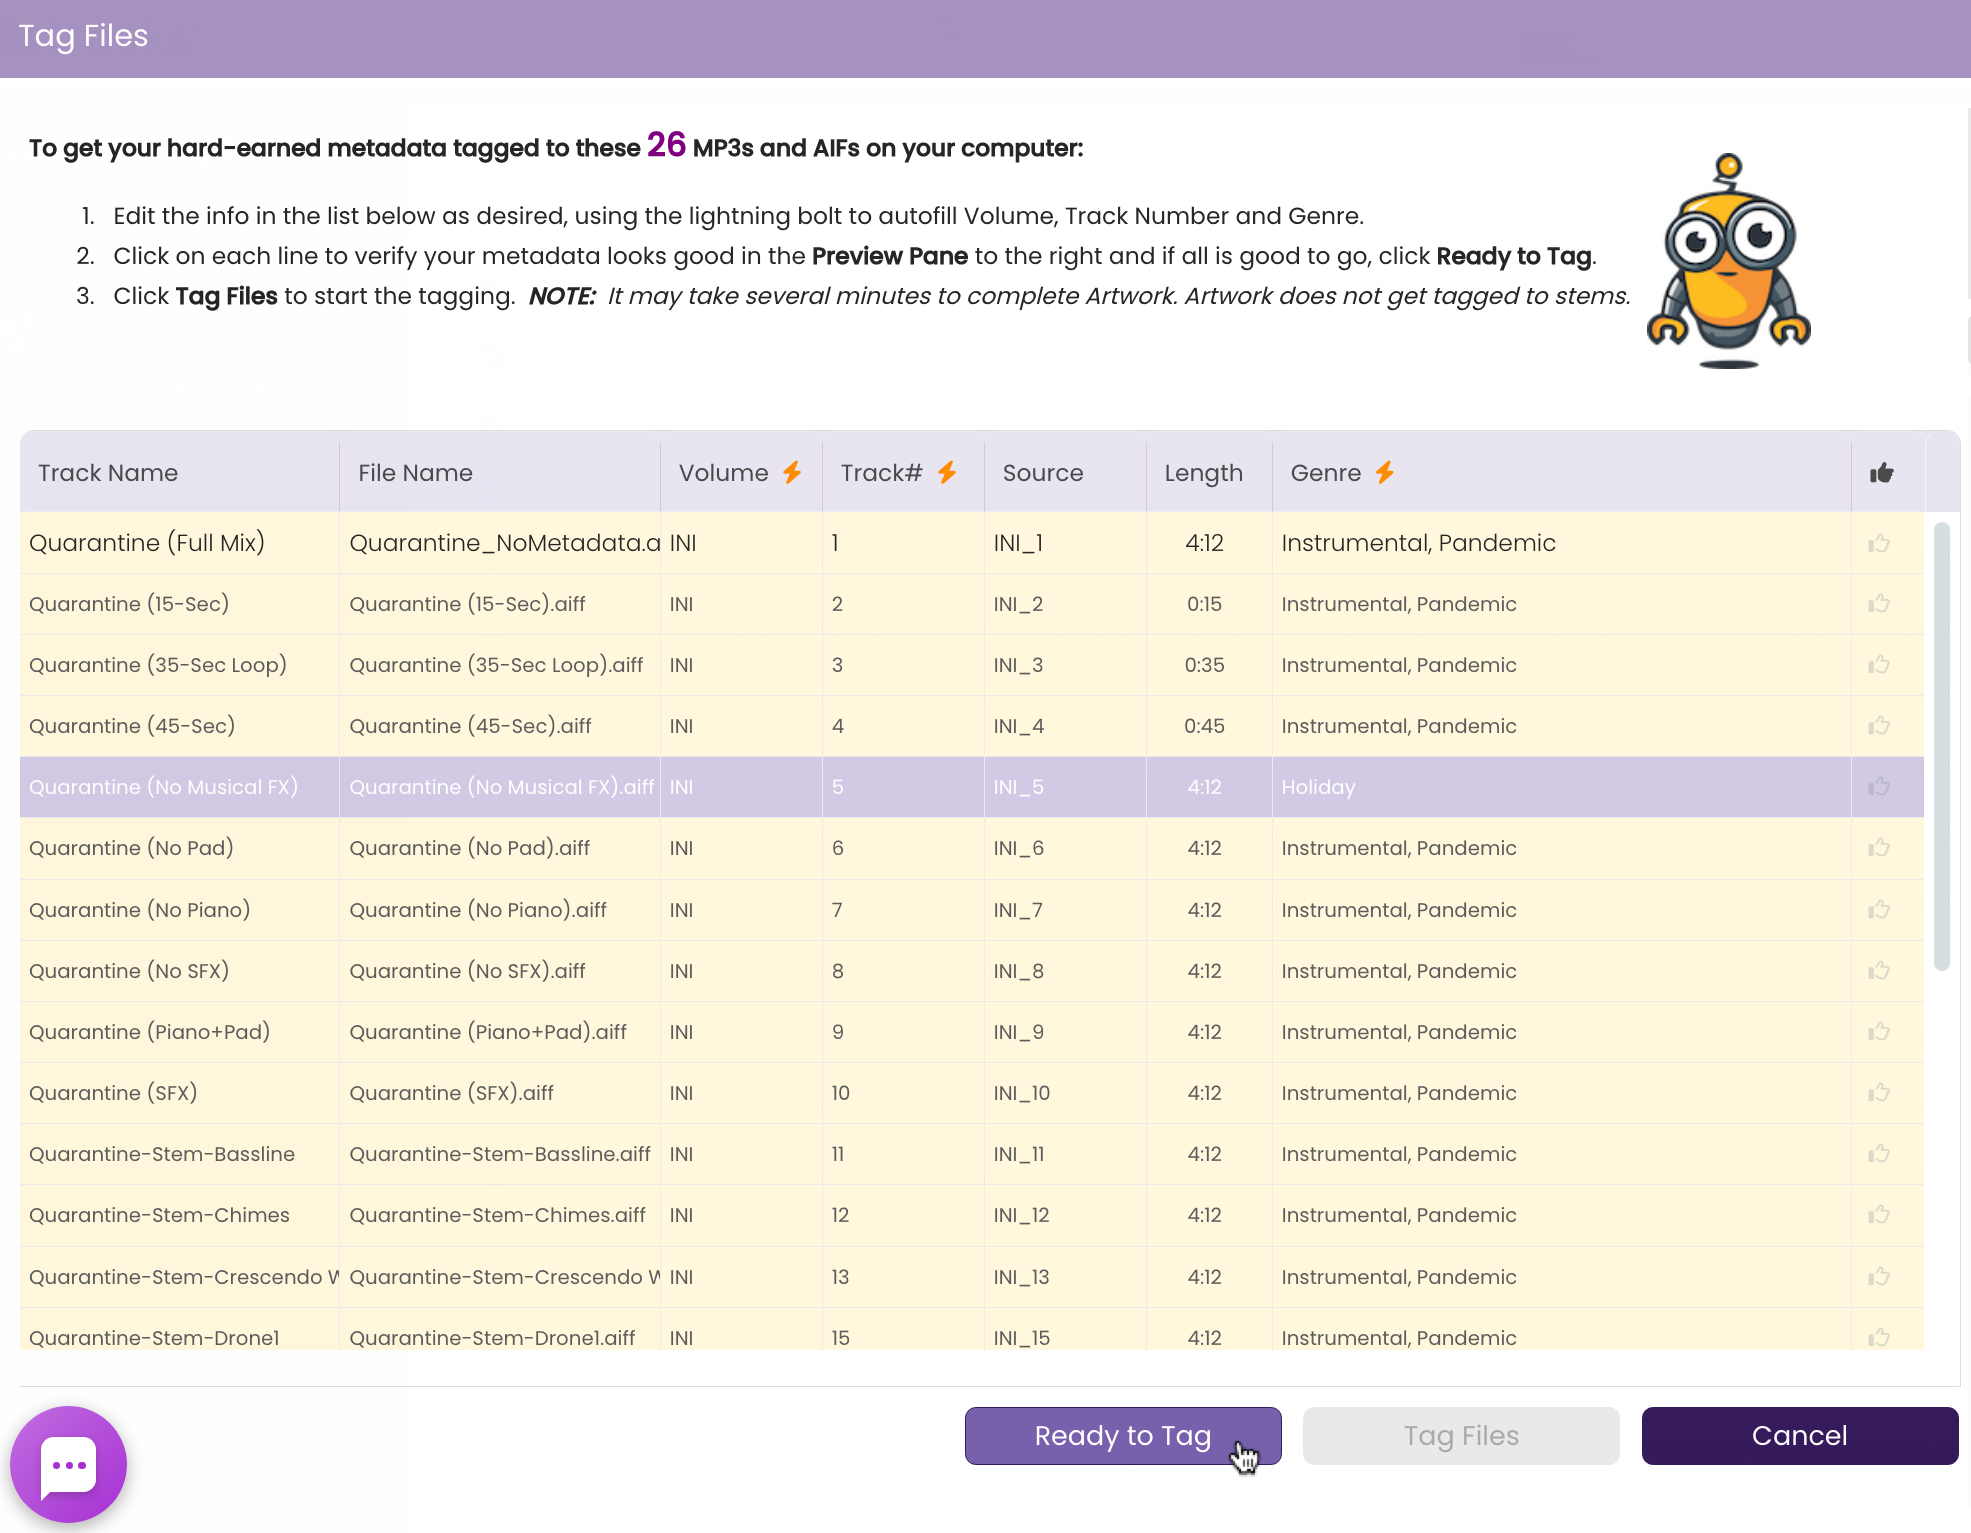
Tagging your track's metadata to its MP3, AIF and WAV files on your hard drive is the last - and arguably most important step before you release your song to the public and industry contacts. An audio file without its critical metadata is akin to a book without a cover - no matter how good the content is, it's unfinished and unsellable. This is why TrackStage highlights untagged tracks in yellow. So you won't unintentionally send out a track that doesn't have its metadata embedded.


Tag Your Metadata
  1. Verify that TrackSync is running.
    Make sure the TrackSync status icon in your CATALOG is purple.

    TrackSync status icon showing as online.

    If the TrackSync status is orange, go to your Applications folder and start the TrackSync application.

    TrackSync status icon is orange when offline.       TrackSync Application icon.


  2. Select the track(s).
    In the CATALOG, expand the Primary so you can see all its linked tracks, then click the checkboxes on the track(s) you wish to tag. You can only tag ONE Primary track and its linked versions at a time.

    Selecting all versions of the untagged tracks.


  3. Click on Tag Files on the Side Menu.

    Clicking the Tag Files button in the TrackStage Side Menu.


    The Tag Files window opens showing the selected tracks.

    Clicking the Tag Files button in the TrackStage Side Menu.


  4. Verify the metadata looks right
    Click on a few tracks and review the data in the Preview Pane to the right of the list to make sure the information is showing up the way you want.

    Clicking the plus to expand linked tracks and only show all tracks linked to the Primary.


  5. Make any last minute edits.

    The lightning bolt next to the Volume header will autofill the volume ID to all linked tracks.


  6. Click Ready to Tag

    Clicking the plus to expand linked tracks and only show all tracks linked to the Primary.


    The Tag Files button changes to active.


  7. Click Tag Files.

    The lightning bolt next to the Volume header will autofill the volume ID to all linked tracks.

    The Tag Files confirmation dialog opens.


  8. Click Ok.

    The Linked tracks are hidden - only the Primary shows.

    TrackSync connects to TrackStage, reviews the changes to the tracks, then writes the metadata to the corresponding audio files in the TrackStage Folder on your computer's hard drive.

    The tagged tracks turn black in the CATALOG.


    The tagged tracks turn black, letting you know that the edits have been written to the audio files on your hard drive.

    The tagged tracks turn black in the CATALOG.