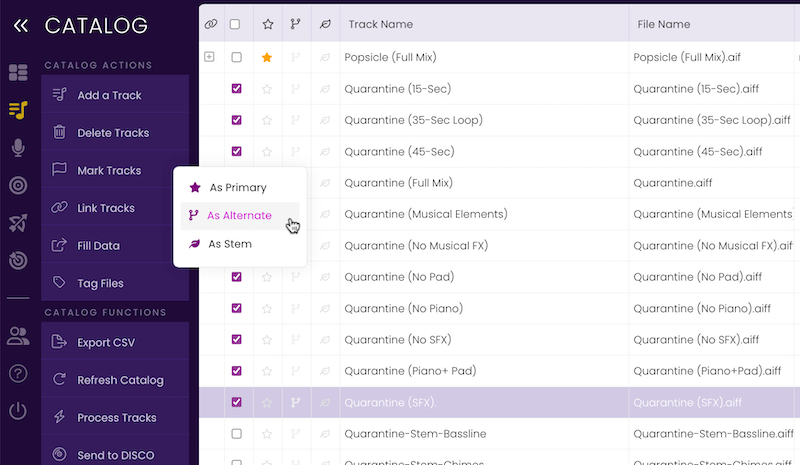
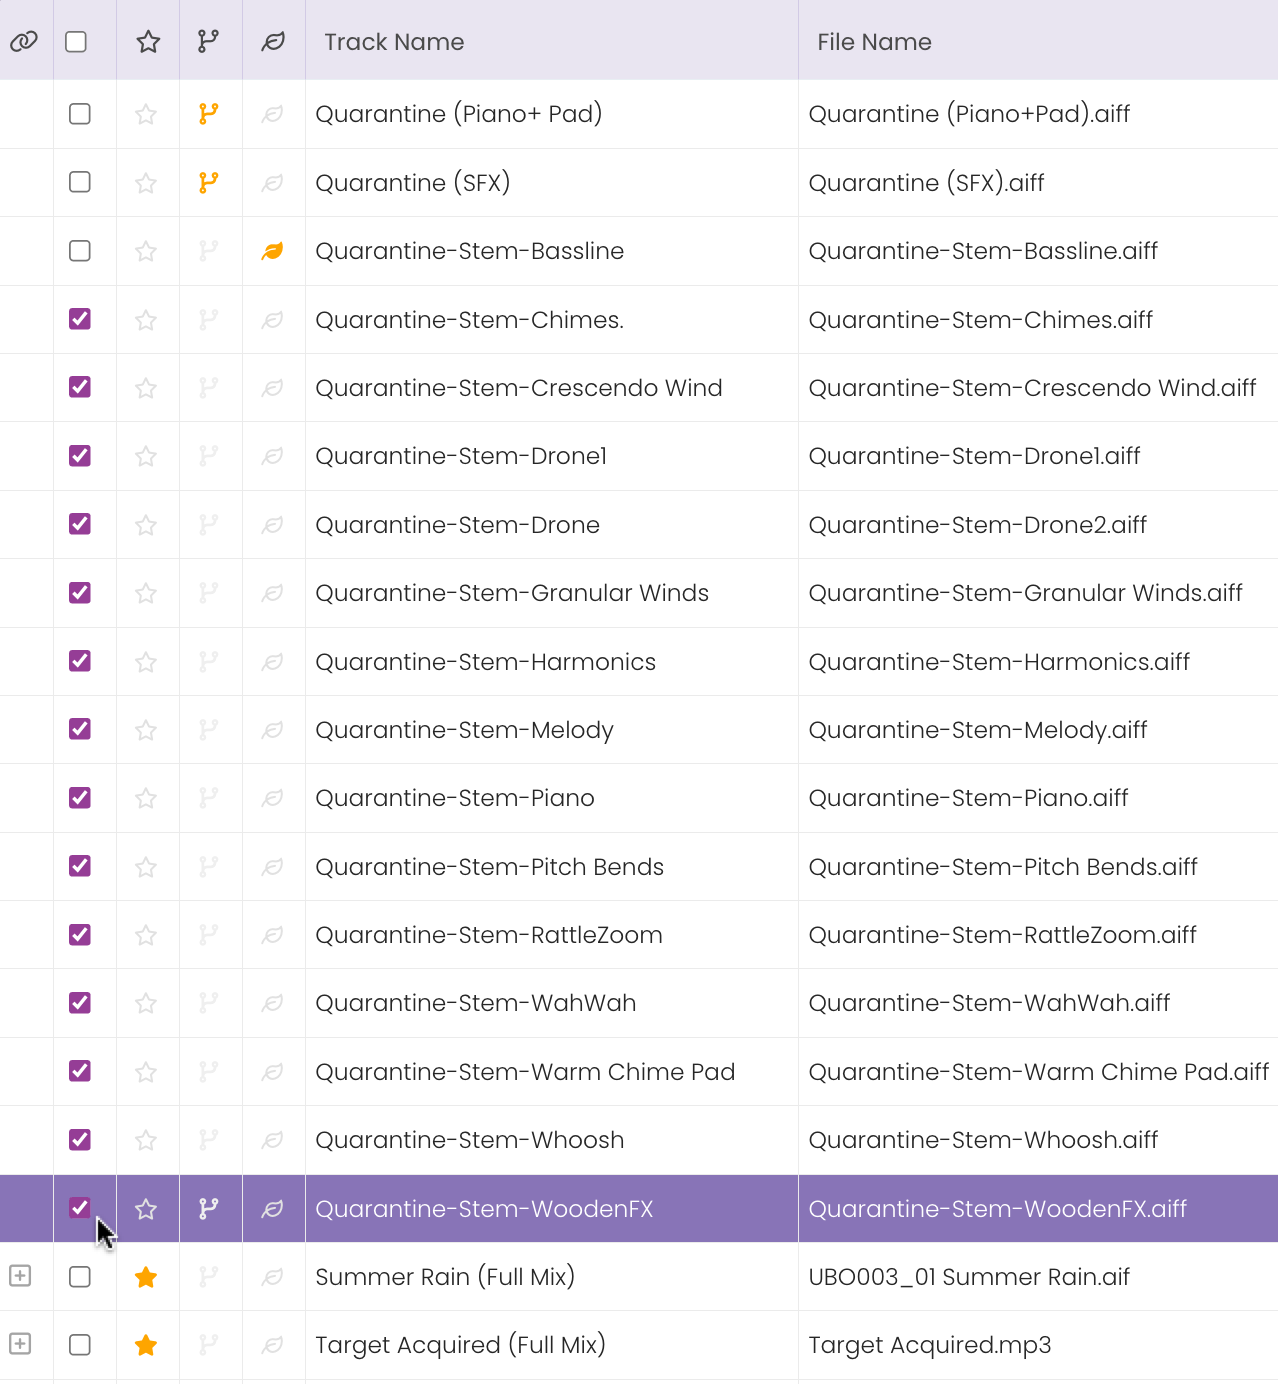
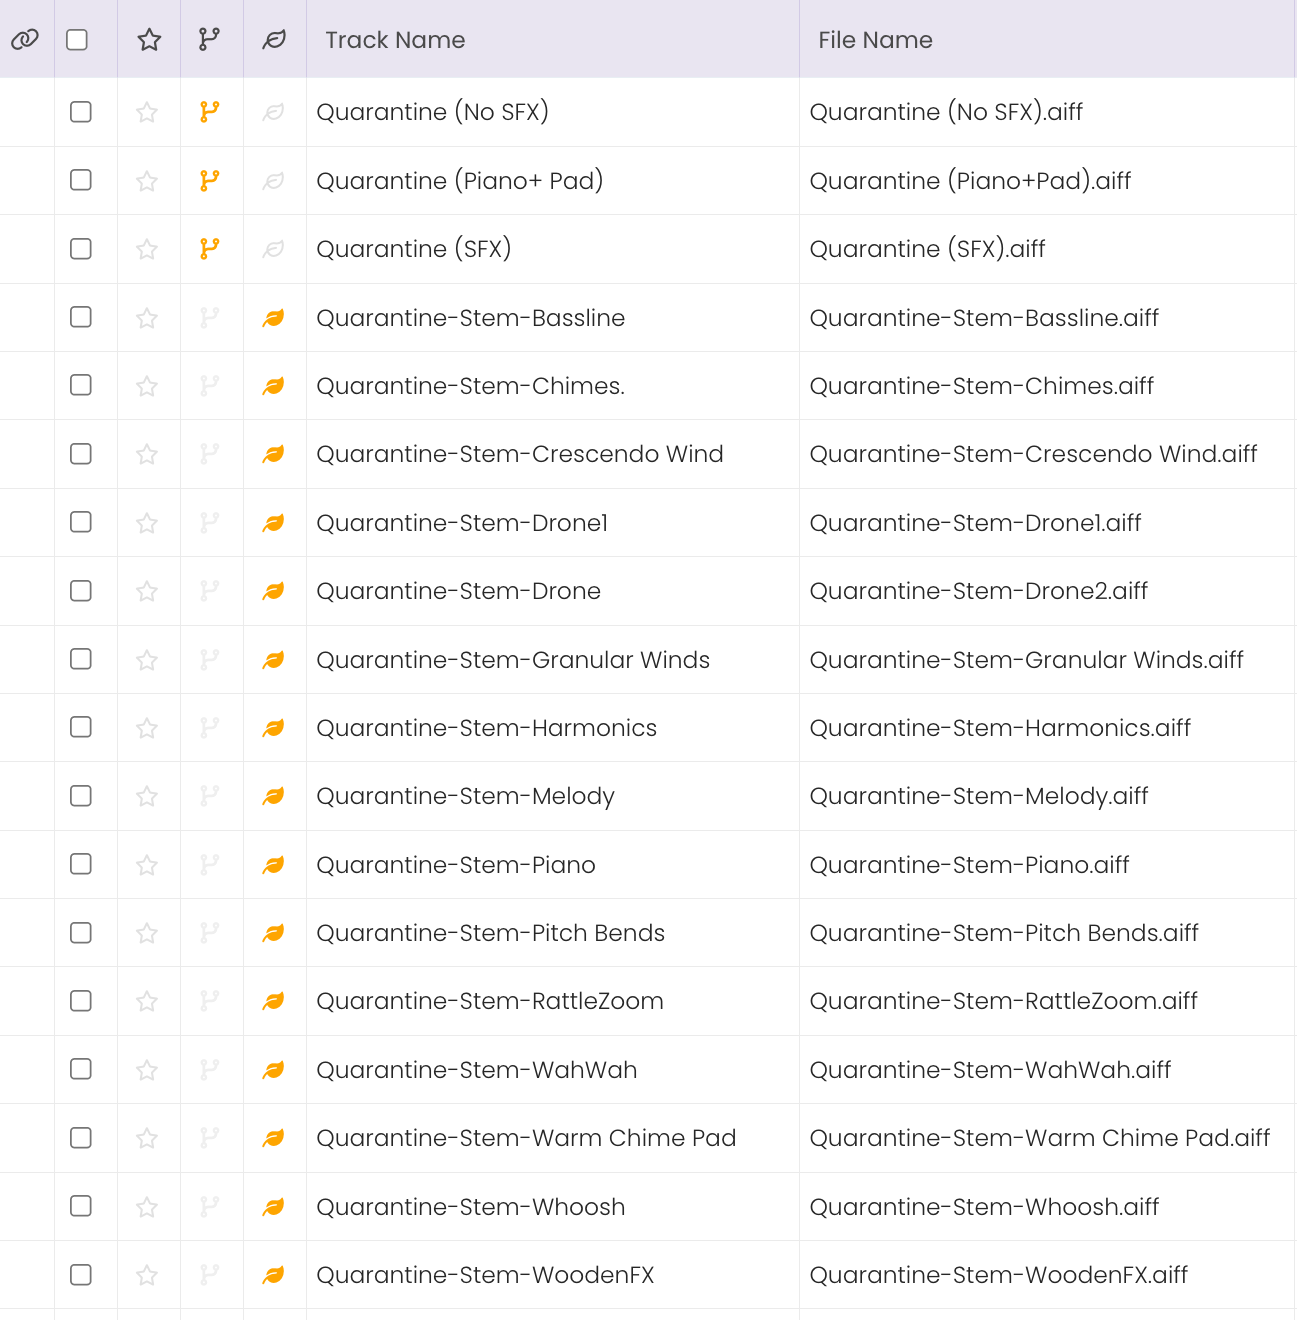
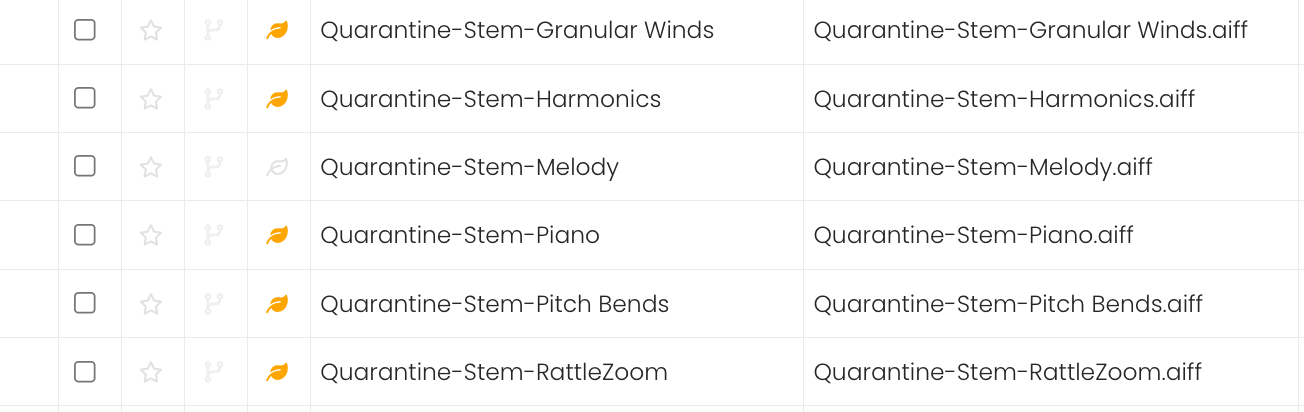
All Tutorials  ⟩  The CATALOG  ⟩  Catalog Workflow  ⟩  Marking Primary, Alternate & Stems

Marking Primary, Alternate, & Stem Tracks

A single song can result in dozens of variations, from cut-downs to alternate instrumentations, from different stylistic versions to stems. Marking each version as a Primary, Alternate or Stem helps you organize your catalog and get insight on the breadth of your product offering.

TrackStage Icon

Primary, Alternate & Stem Classes

TrackStage uses Primary, Alternate and Stem classes to help you organize your catalog.

In the sync world, you will likely have dozens of alternates (acoustic, instrumental, cutdowns, etc.) and stems (drums only, guitars only, etc.) for each individual song (primary) you produce. By organizing your tracks into these sub-categories, you will be able to get a clearer view of the individual songs and the various versions of those songs that you have available on-hand to pitch or submit.

TrackStage uses the following icons to denote each track type:

Primary Tracks
Alternate Tracks
Stems


Primary Tracks

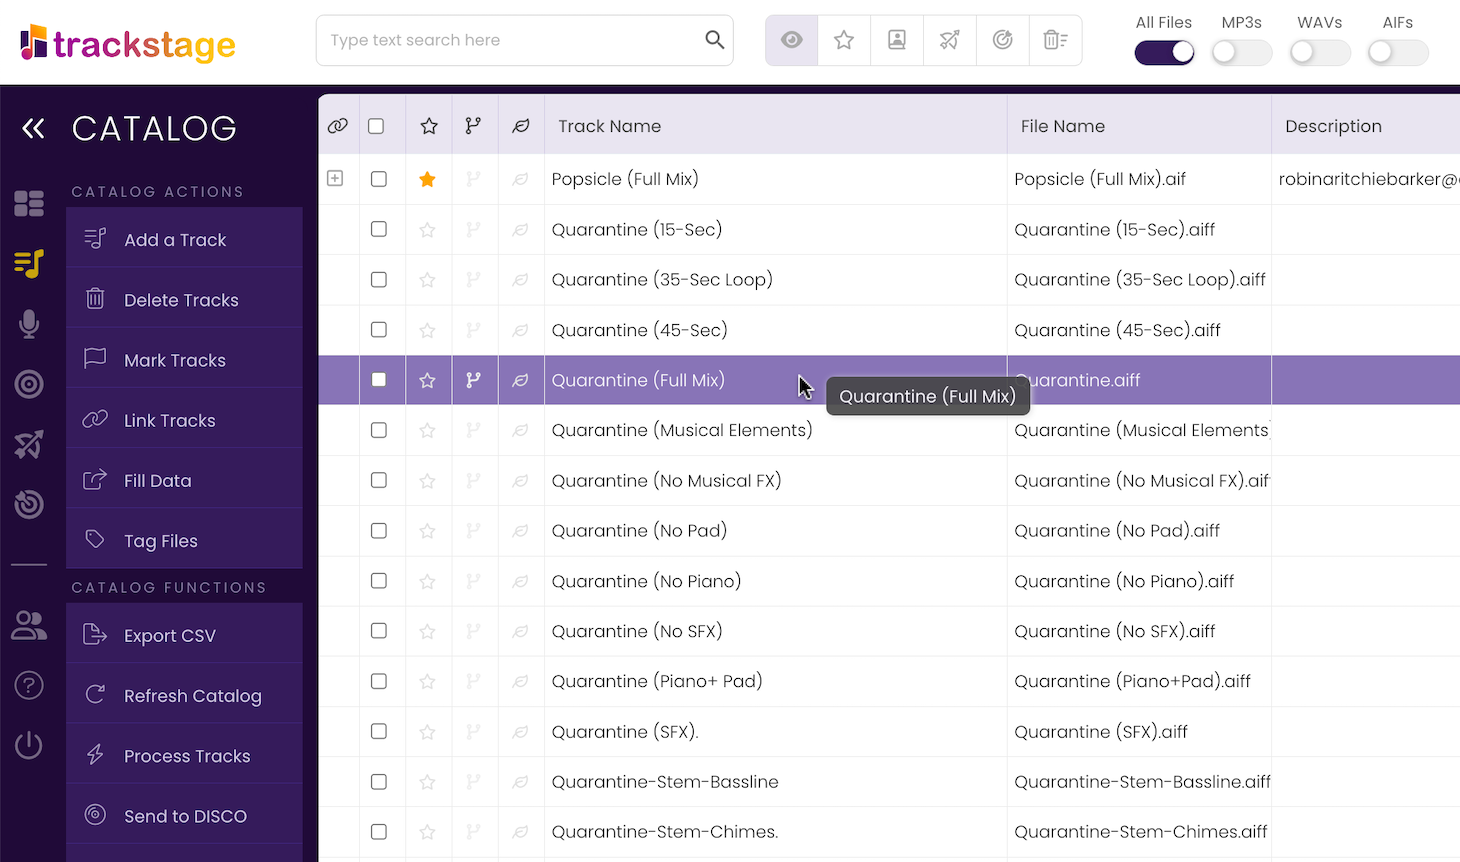
Typically, the original full mix of your track will be your PRIMARY Track. This is the track from which all metadata flows. All keywords and other information are first entered on the Primary Track, then you can easily group Alternates and Stems and autofill this metadata into the other versions with the Fill Data function.

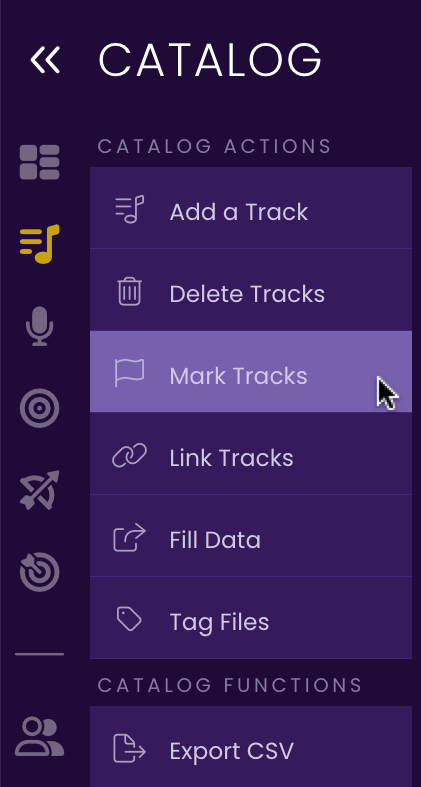
Mark a Track as Primary
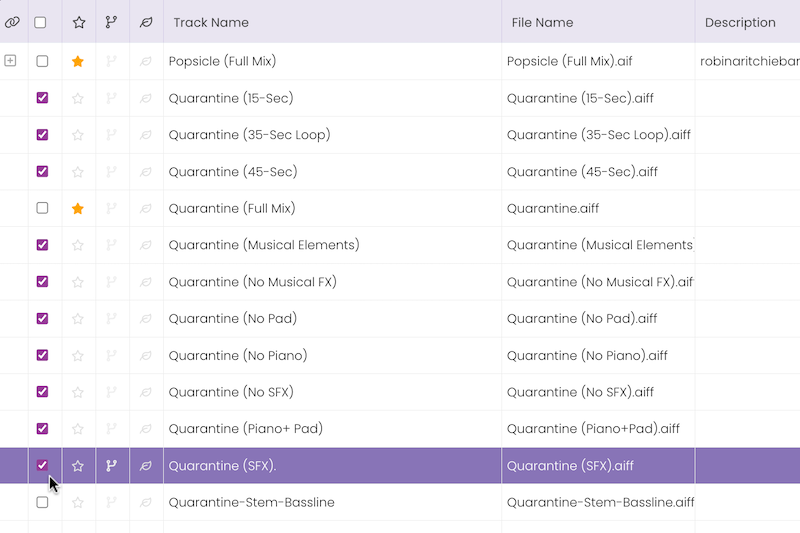
  1. Select the Full Mix version of the track.
    Choose the Full Version AIF or MP3 of the song (WAVs don’t hold as much metadata, so you don’t want a WAV to be the Primary).

    Click on the track to select it.


    Selecting a track in the TrackStage Catalog.

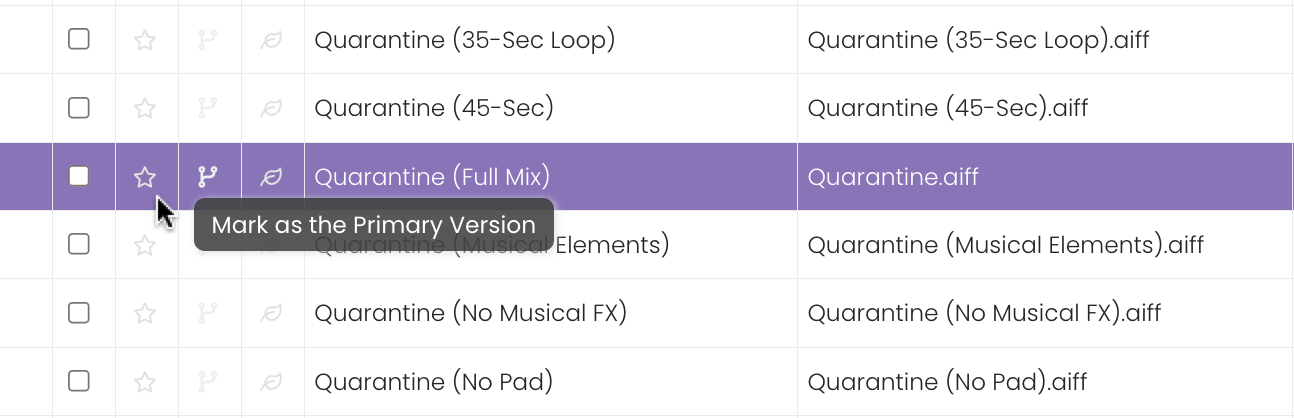
    NOTE: You can only have ONE primary version of a track. If you have multiple Full Versions, just select one to be the Primary and the others can be Alternates.


  2. Mark the track as a Primary.
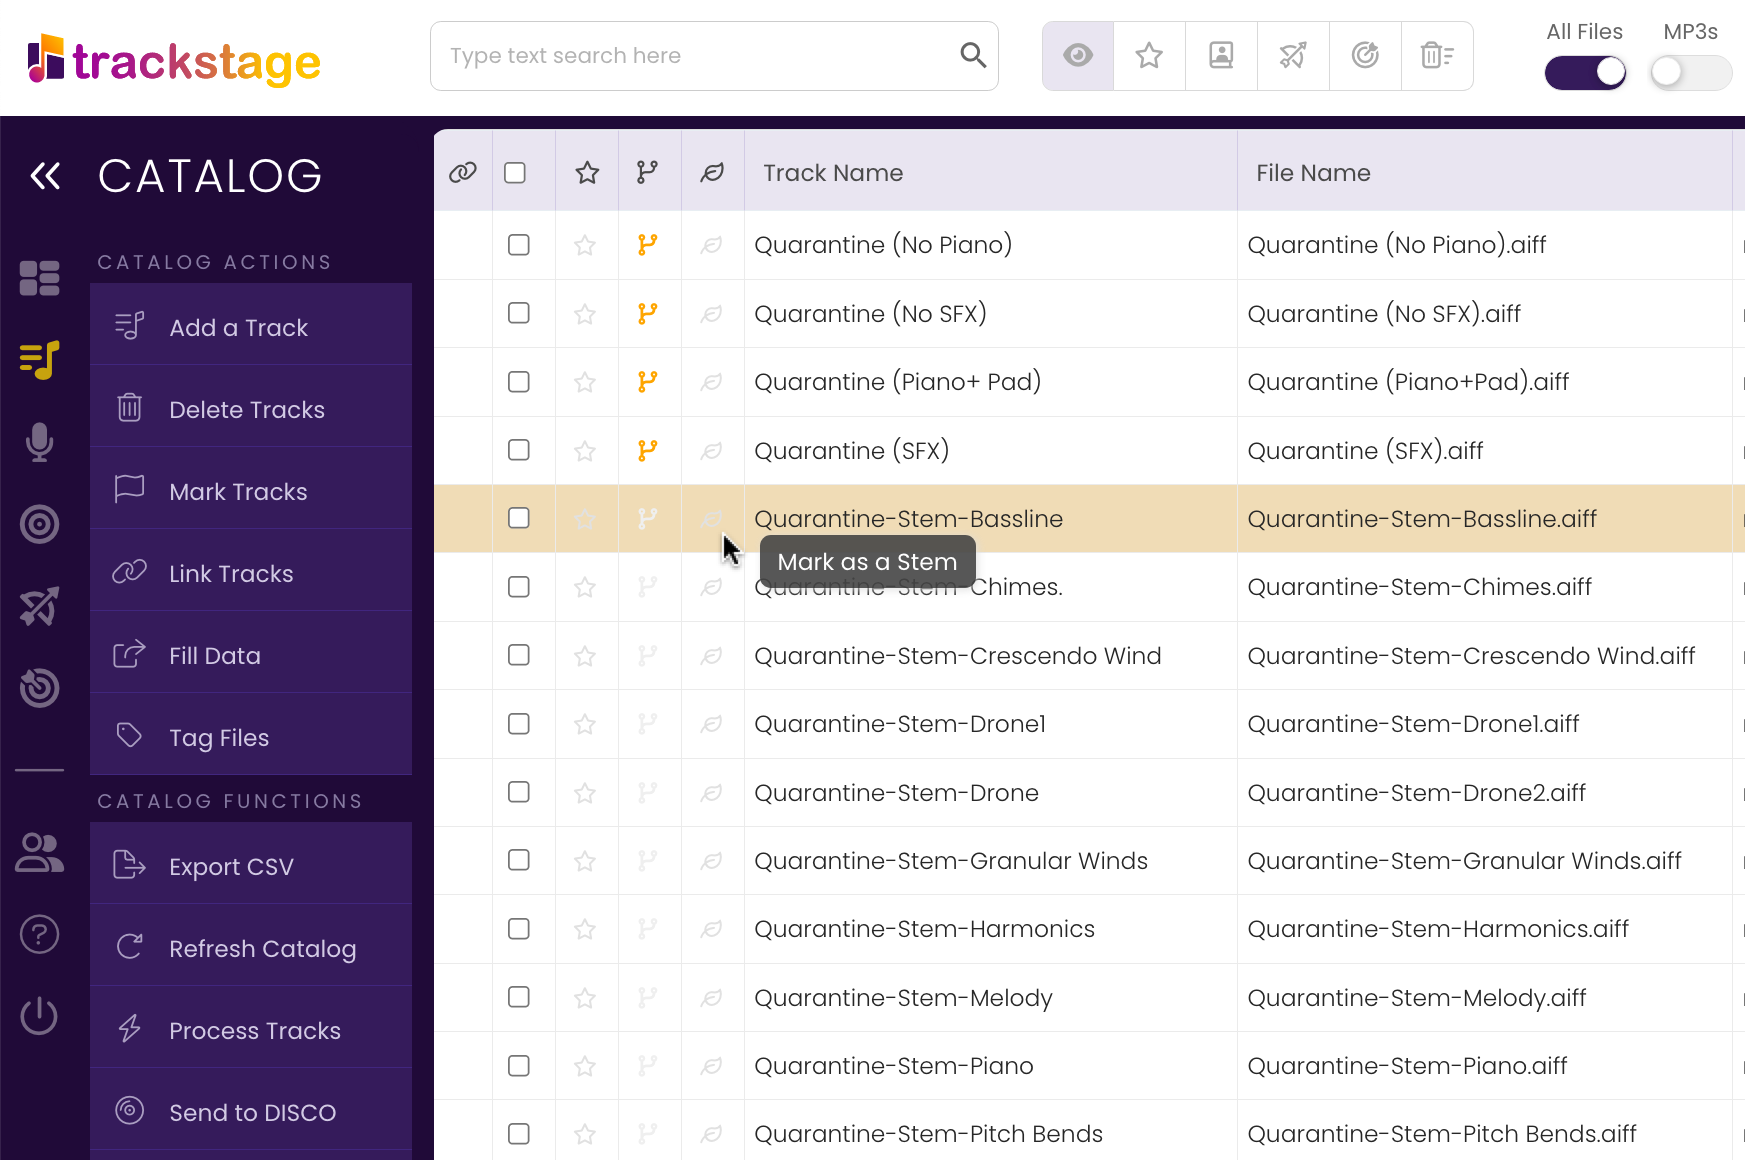
    Click the icon in the third column on the track record.

    Marking the track as a Primary

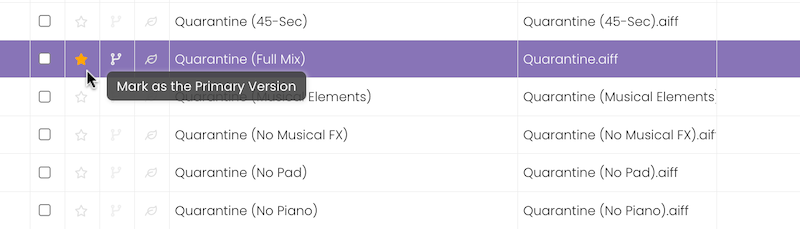
    The track is marked as a Primary.

    The Catalog showing the track marked as a Primary.

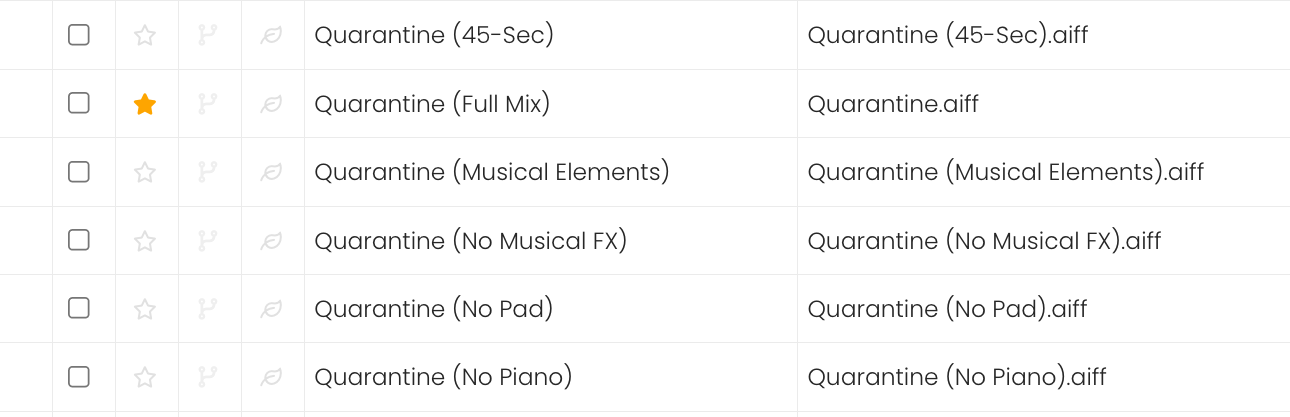
Remove the Primary Class from a Track
  1. Click on the track's Primary icon.
    Click the icon on the track record.

    Clicking on the track's Primary icon.

    The Primary class is removed.

    The Primary icon is cleared

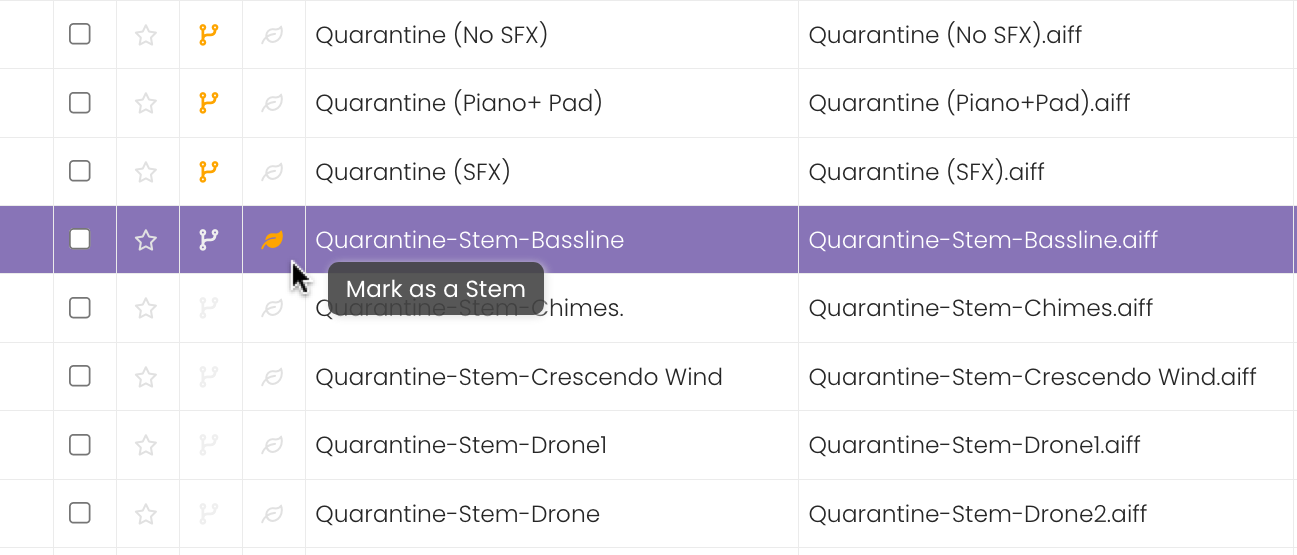
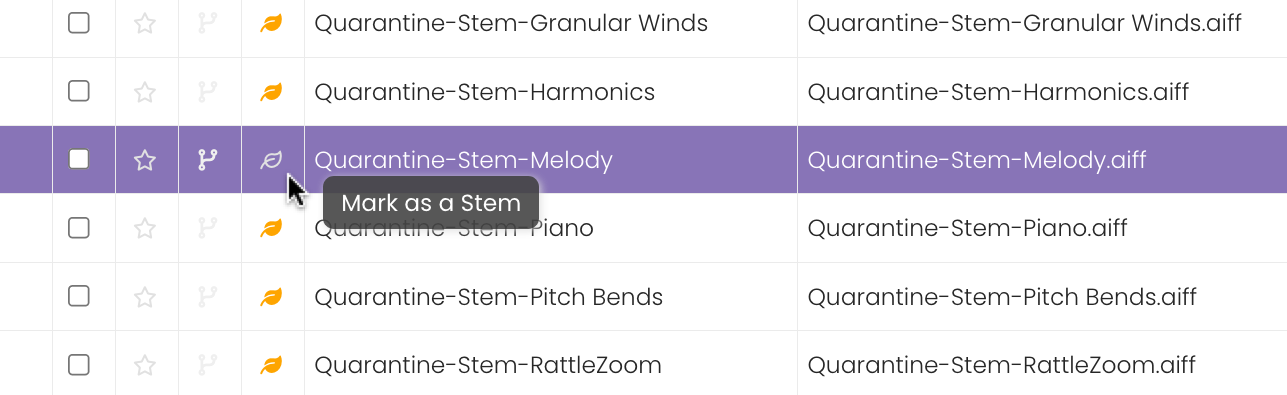
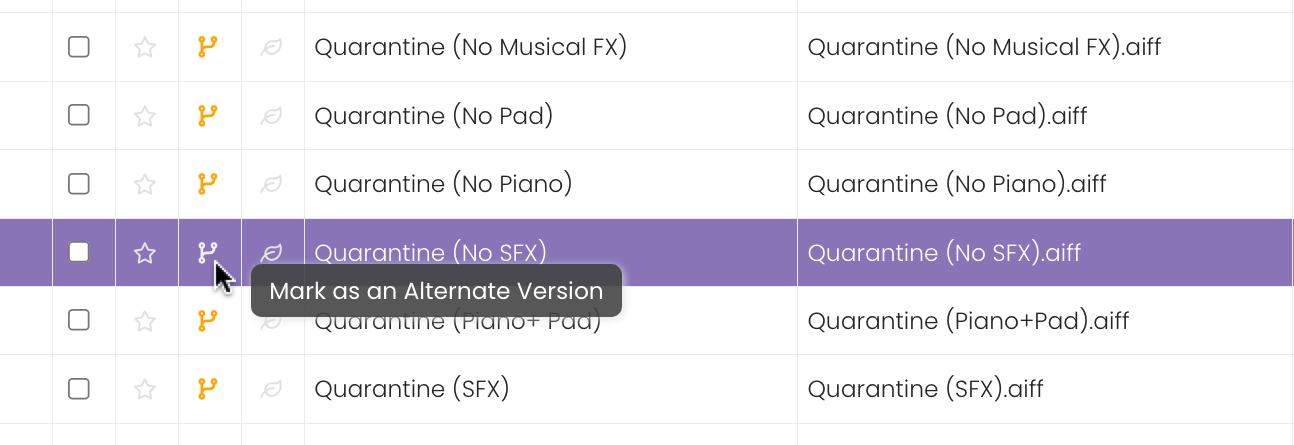
    Alternately, you can click on the track's Alternate or Stem icon to change the track to that class.


Alternate Tracks

Alternates are versions of your Primary Track that you create to fill different needs in the marketplace. They might be acoustic-only, cut-downs (15,30, 60-seconds, etc.), holiday, instrumental etc. Alternate versions will typically share a single ISWC code but might have multiple ISRC codes if you are selling your tracks to consumers.

All basic metadata information including Artwork is shared from the Primary Track to Alternates when you use the Fill Data and Tag Files functions. Rights information is copied only to the extent that it appears in the basic metadata. Details on contributors, publishing and other rights info is housed only on the Primary Track unless separately entered on the Alternate track.

Mark a Single Track as an Alternate
  1. Select the version of the track you want to mark as an Alternate.

    Selecting a track to mark as an Alternate version in the TrackStage Catalog


  2. Mark the track as an Alternate.
    Click the 
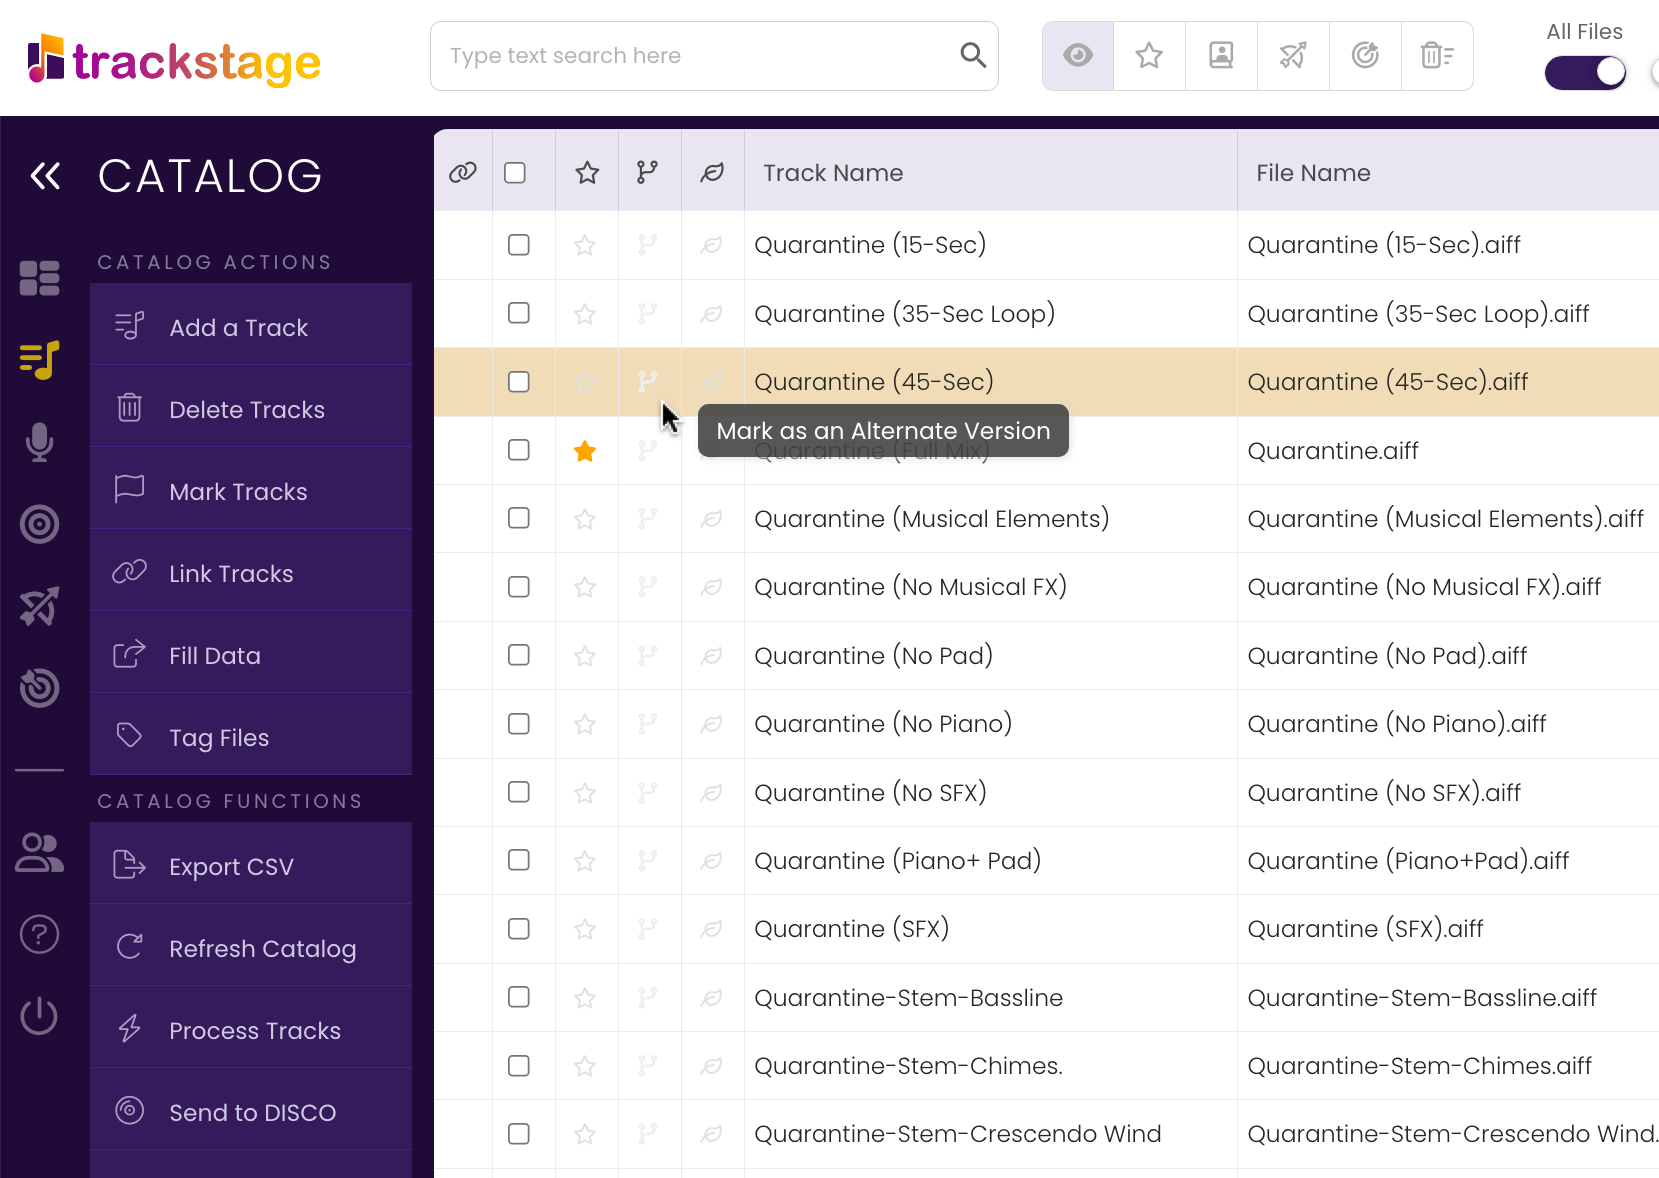
icon in the fourth column on the track record.

    Marking the track as an Alternate version.

Mark Multiple Tracks as Alternates
  1. Select the Alternate versions (not stems) of your track.
    Click the checkbox of each track to select it. Shift-click to select multiple tracks.

    Clicking in the checkboxes on the track records to select multiple tracks.


  2. Click on Mark Tracks in the Side Menu.

    The Mark Tracks button in the Side Menu.

    The Mark Tracks sub-menu opens.


  3. Select "As Alternate" from the sub-menu.

    Selecting As Alternate from the Mark Tracks sub-menu.

    The Mark Tracks confirmation dialog box opens.


  4. Click Assign.

    Clicking the Assign button the confirmation dialog box.

    The tracks are marked as Alternates.

    The TrackStage Catalog showing the tracks marked as Alternates

Remove the Alternate Class from a Track
  1. Click on the track's Alternate icon.
    Click the icon on the track record.

    Clicking on the track's Alternate icon.

    The Alternate class is removed.

    The TrackStage Catalog showing that the Alternate icon has been removed from the track.

    Alternately, you can click on the track's Primary or Stem icon to change the track to that class.

Stems

Stems are the component acoustic elements that make up a recording. How many stems and how granular they are is dependent on what your clients need. For a song you might typically have a Vocals stem, a Guitar stem, Drums stem and so on, though for more complex instrumentations like orchestration, you might have Violins and Cellos stems as opposed to an overall Strings stem.

Usually stems are WAV files, and as such do not support extensive metadata. AIF and MP3 Stems are only tagged with the Grouping and Comments sections so that rights and contact information are preserved.

Mark a Single Track as a Stem
  1. Select the version of the track you want to mark as a Stem.

    Selecting a track to mark as a Stem in the TrackStage Catalog


  2. Mark the Track as a Stem.
    Click the 
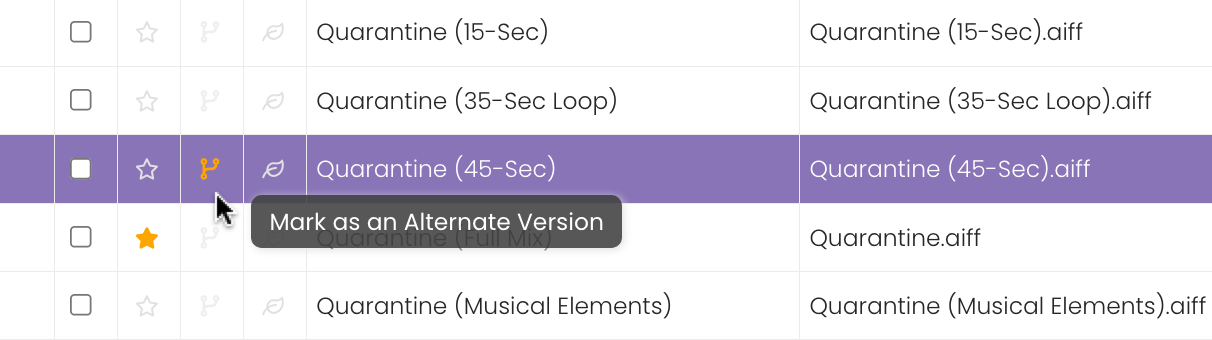
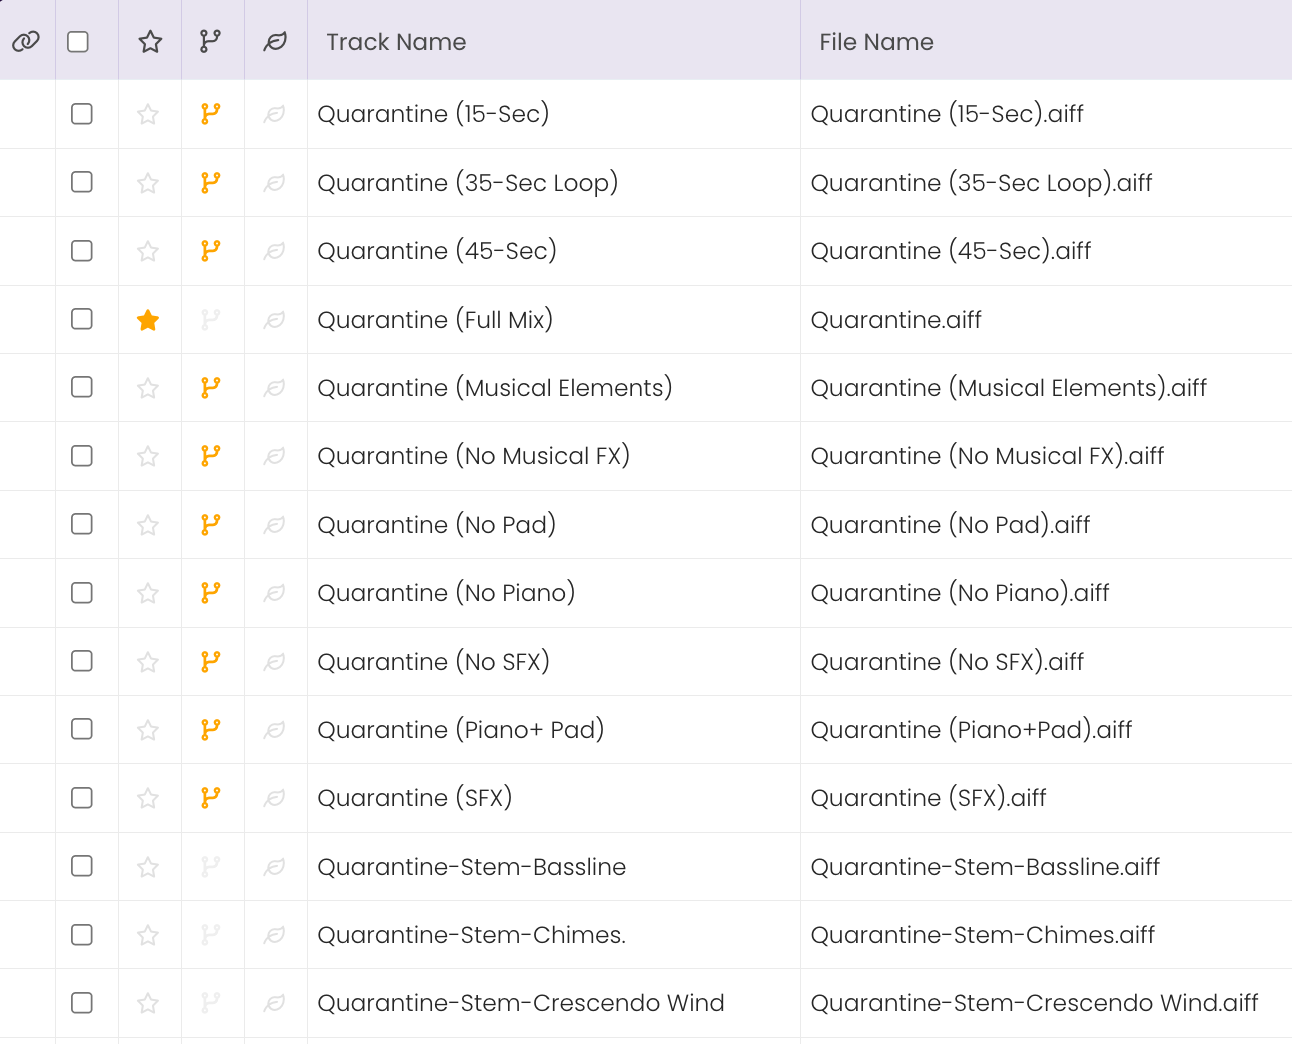
icon in the fifth column on the track record.

    Marking the track as a Stem.

Mark Multiple Tracks as Stems
  1. Select the Stem versions of your track.
    Click the checkbox of each track to select it. Shift-click to select multiple tracks.

    Clicking in the checkboxes on the track records to select multiple tracks.


  2. Click on Mark Tracks in the Side Menu.

    The Mark Tracks button in the Side Menu

    The Mark Tracks sub-menu opens.


  3. Select "As Stem" from the sub-menu.

    Selecting As Stem from the Mark Tracks sub-menu.

    The Mark Tracks confirmation dialog box opens.


  4. Click Assign.

    Clicking the Assign button the confirmation dialog box.

    The tracks are marked as Stems.

    The TrackStage Catalog showing the tracks marked as Stems.


Remove the Stem Class from a Track
  1. Click on the track's Stem icon.
    Click the icon on the track record.

    Clicking on the track's Stem icon.

    The Stem class is removed.

    The TrackStage Catalog showing that the Stem icon has been removed from the track.

    Alternately, you can click on the track's Primary or Alternate icon to change the track to that class.