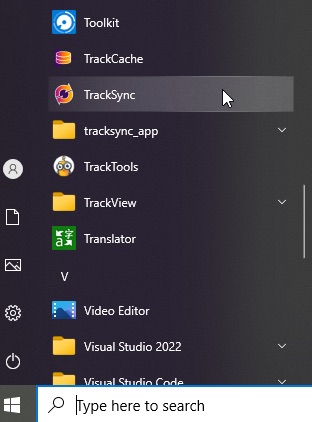
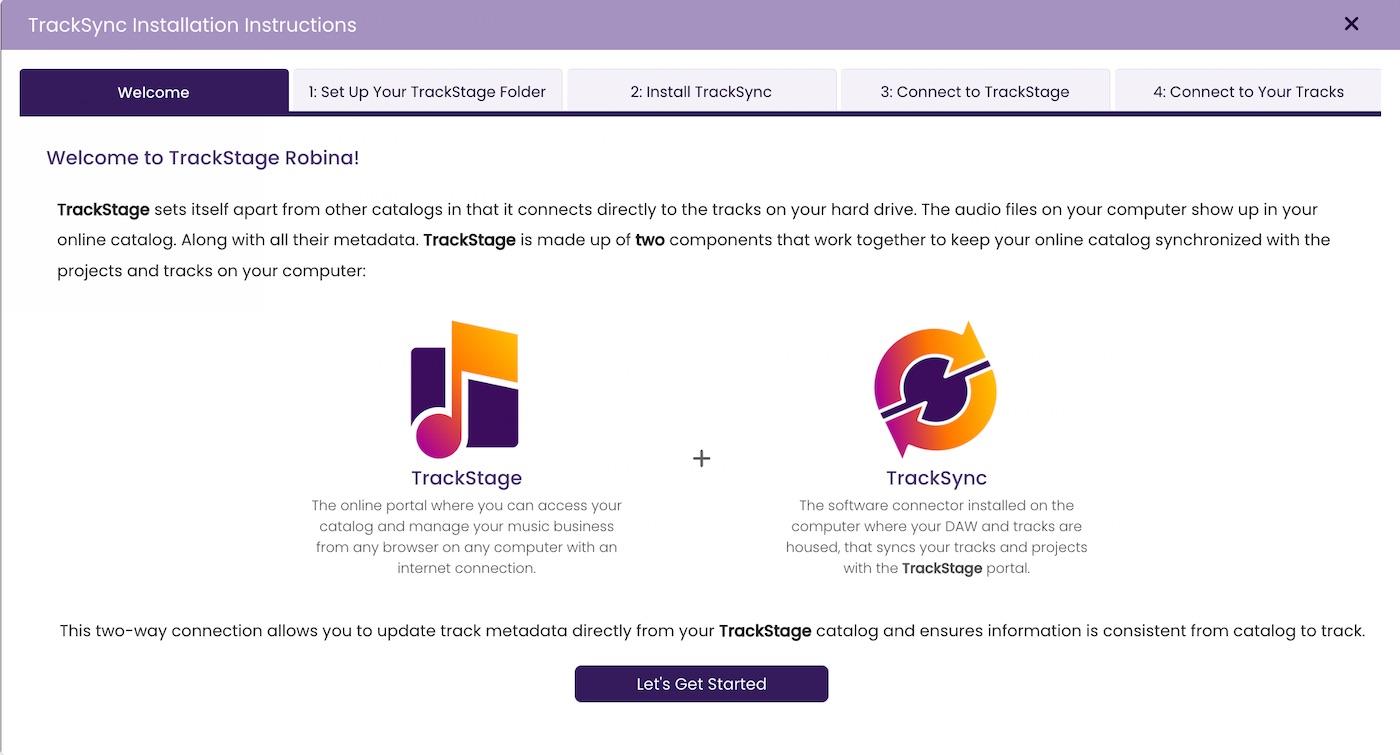
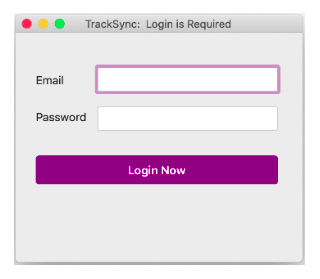
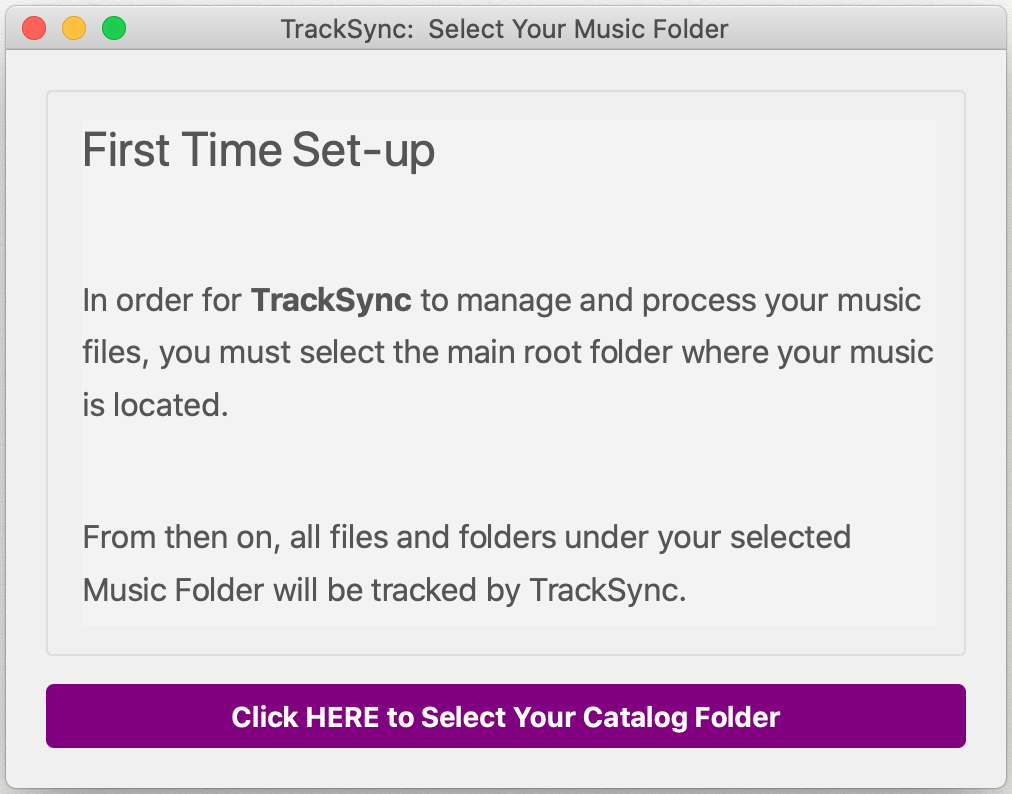
All Tutorials  ⟩  The CATALOG  ⟩  Working with TrackSync

Working with TrackSync

TrackSync does all the heavy lifting between your online catalog and the files in your TrackStage Folder. It's the powerhouse that sets TrackStage apart from catalogs that aren't synched with your actual audio files.

TrackSync Icon

Starting TrackSync

Whenever you make changes to your TrackStage Folder like adding or deleting tracks, or whenever you want to Tag metadata to your audio files, or cache tracks to send them to Contacts, you first need to make sure that TrackSync is running.

  1. Verify that TrackSync is running.
    Make sure the TrackSync status is purple.

    TrackSync status icon in purple, showing that it is online.


  2. If the TrackSync status is orange, start the TrackSync application.

    TrackSync application icon.

    Mac OS: Go to your Applications folder and click on the TrackSync application icon.

    TrackSync application icon.

    Windows: Go to your Start Menu and click on TrackSync.

    TrackSync application icon.

    TrackSync will start up and the status icon will turn purple.

    TrackSync application icon.


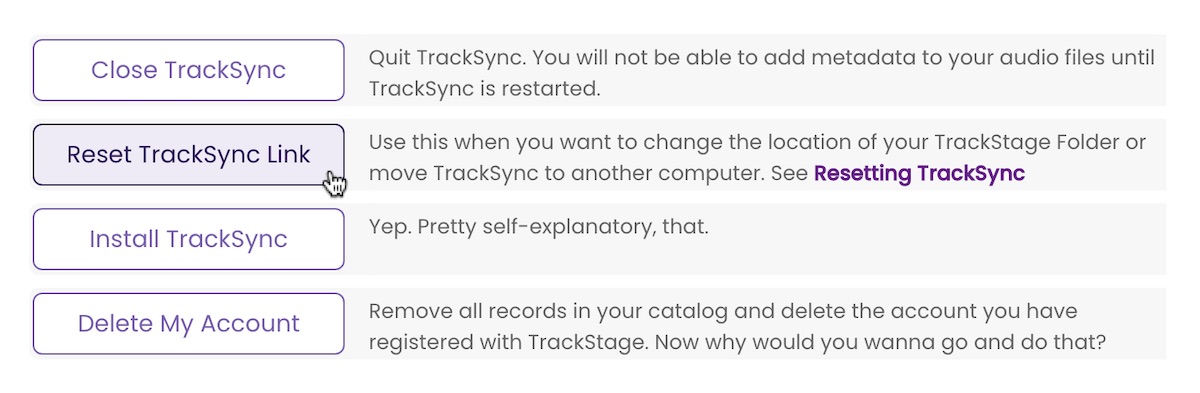
Reinstalling TrackSync

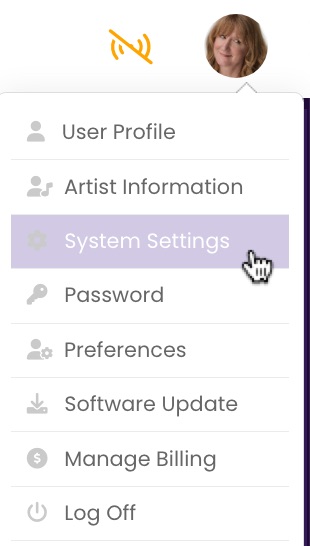
In the event you need to reinstall TrackSync, you can find the installer within the TrackStage User Profile.

  1. Verify that TrackSync is running.
    Make sure the TrackSync status is purple.

    TrackSync status icon in purple, showing that it is online.


  2. From the User Profile dropdown menu, select System Settings.

    The System Settings menu item in the User Profile dropdown.


  3. Click on the Install TrackSync button.

    Clicking the Install TrackSync button in System Settings.

    The TrackSync installation window opens.

    The TrackSync installation popup window.


  4. Follow the instructions in the installer to reinstall TrackSync.


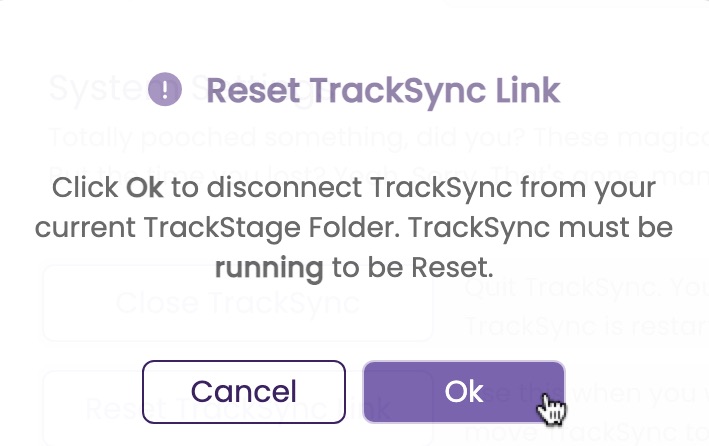
Resetting the TrackSync Link

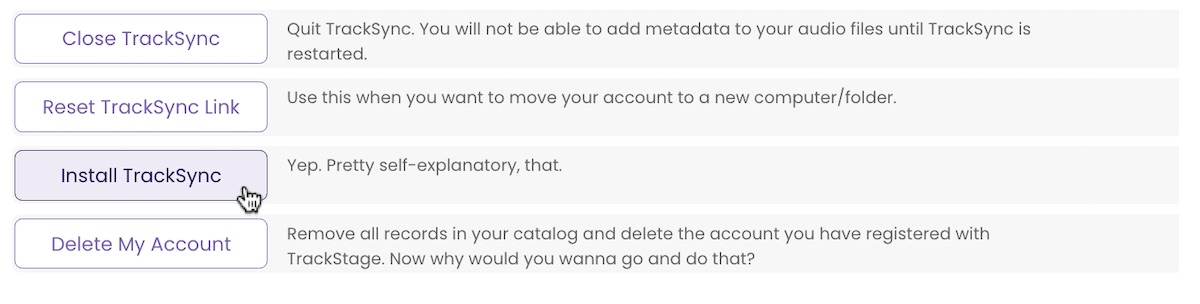
Use the Reset TrackSync function when you want to move TrackSync and/or your TrackStage Folder to another computer/drive/location. Once the connection between TrackSync and the tracks in your TrackStage Folder has been established, you have to exercise extreme caution when changing the location of either component to prevent data loss and account corruption.

  1. Verify that TrackSync is running.
    Make sure the TrackSync status is purple.

    TrackSync status icon in purple, showing that it is online.


  2. Go to System Settings in your User Profile
    Click on the User Profile dropdown menu and select System Settings.

    The System Settings menu item in the User Profile dropdown.


  3. Click on the Reset TrackSync Link button.

    Clicking the Install TrackSync button in System Settings.

    The Reset TrackSync Link confirmation dialog opens.


  4. Click Ok.
    The TrackSync link to your TrackStage Folder and account is reset.

    The TrackSync installation popup window.


  5. Install TrackSync on the new computer/drive (if applicable)
    If you are just moving your TrackStage Folder to a different location on the same computer, there is no need to reinstall TrackSync. For instructions on how to install TrackSync click here.


  6. Open TrackSync.

    Mac OS: Go to your Applications folder and click on the TrackSync application icon.

    TrackSync application icon.

    Windows: Go to your Start Menu and click on TrackSync.

    TrackSync application icon.


  7. Log in to TrackSync.
    Use the same email and password as you used to create your TrackStage account.


  8. Click Login Now.
    After a few moments, the TrackSync Set-up window will open automatically.

  9. Select your Catalog Folder in the TrackSync Set-Up window. Click on the Click HERE to Select Your Catalog Folder button.


  10. Navigate to the new location of your TrackStage Folder.


  11. Click Open to select your folder.
    TrackSync will connect to the folder and then will log you out and back in to TrackStage.


  12. Click on Process Tracks > Process Folder Updates


  13. Allow TrackSync to Process Your Tracks
    TrackSync will now go through your TrackStage folder and reconnect to each track. All metadata and information that was on your tracks in the previous location will be preserved.


What's NEXT...